Author Topic: 1968 San Jose GT 390 Fastback Seam Sealer Questions  (Read 1252 times)

Offline bullitt68

  • Hero Member
  • *****
  • Posts: 2164
1968 San Jose GT 390 Fastback Seam Sealer Questions
« on: August 24, 2019, 04:04:14 AM »
I am assuming that this is all factory applied sound deadener/seam sealer
Mike
1968 Mustang Fastback GT 390 Raven Black, 4 speed
8R02S162374, San Jose, June 5, 1968

Offline ruppstang

  • Hero Member
  • *****
  • Posts: 3910
Re: 1968 San Jose GT 390 Fastback Seam Sealer Questions
« Reply #1 on: August 24, 2019, 10:05:09 AM »
Your car is very nice underneath. The drop offs appear to be original to me. It looks like there was a plate repair for cracks in the upper rear shock mounts. Cracks were pretty common especially if air shocks were installed.

Offline J_Speegle

  • Administrator
  • Hero Member
  • *****
  • Posts: 24546
Re: 1968 San Jose GT 390 Fastback Seam Sealer Questions
« Reply #2 on: August 24, 2019, 03:44:14 PM »
While we are on the subject I am not going to not use the Shelby scoops that were on my car when I purchased it and going back to the factory quarter side vents and the lower quarter trim. Looking to confirm what holes should be drilled for the trim. Are the 3 rear holes pictured correct or should I weld them up as well and drill new holes.

You get to fill some and leave some :) Ignore the dent


Addressing one set of pictures at a time to cut down on confusion
Jeff Speegle

Anything worth doing is worth doing concours ;)

Offline J_Speegle

  • Administrator
  • Hero Member
  • *****
  • Posts: 24546
Re: 1968 San Jose GT 390 Fastback Seam Sealer Questions
« Reply #3 on: August 24, 2019, 04:41:00 PM »
This may be obvious but just want to confirm with rear drop off panel is correct/original/factory installed

Yes they appear to be as original in the areas shown
Jeff Speegle

Anything worth doing is worth doing concours ;)

Offline J_Speegle

  • Administrator
  • Hero Member
  • *****
  • Posts: 24546
Re: 1968 San Jose GT 390 Fastback Seam Sealer Questions
« Reply #4 on: August 24, 2019, 04:54:37 PM »
I am assuming that this is all factory applied sound deadener/seam sealer

Addressing just the two floor pictures in reply #13


There would have been seam sealer applied around the inner (front and back) seat belt anchor plates, between the rocker panels and the floors and along the trunk drops to quarter panel pinch weld shown in reply #12


Noticed that a mistake was made when they assembled your car that was caught and addressed before the floor coating was applied. Just stands out and you can choose to redo it as Ford would have planned on building the car or leave it as part of its history. Not many will see or notice the difference ;)


Marty noticed the washers that had been added by a PO and we've already discussed the under ride traction bar forward mounts welded to the frame rails :(  Of course the black paint applied over both modifications is not original
« Last Edit: August 24, 2019, 05:23:07 PM by J_Speegle »
Jeff Speegle

Anything worth doing is worth doing concours ;)

Offline J_Speegle

  • Administrator
  • Hero Member
  • *****
  • Posts: 24546
Re: 1968 San Jose GT 390 Fastback Seam Sealer Questions
« Reply #5 on: August 24, 2019, 06:24:11 PM »
REMINDER for others viewing the threads. These responses are tailored to the particular plant and production period. If you own another 68 Mustang or Cougar for that matter built at another plant or at San Jose but a different period of time these details may not original for your car!

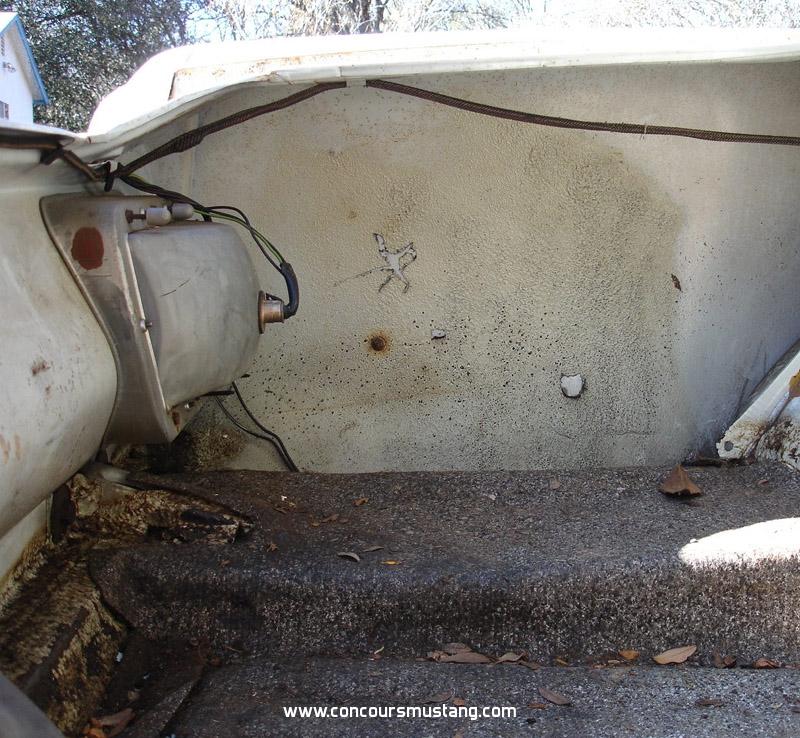
Sorry no quick or easy way to do this - For the top picture in Reply #13


Light blue arrow - Typical sound deadener . Staying away from the ends/sides - top and bottom of the panel

Blue arrow -  Appears they were having issues with the applicator, thickness of the product or air pressure producing a sub standard pass with the wand giving us this thin, ineffective effort.

Yellow arrow - No seam sealer was used on the upper or side edges of the bumper bracket to taillight panel. You should see a gap (large or thin between the two panels

Orange arrow - This seam would have had an ugly application of spray seam sealer producing a rough final look with sharp or feather edge depending on the angle of the application, thickness of product and or distance to the surface.

Green arrow - Same as above

Purple arrow - This area around the rear bumper bracket would have been non- brushed/wiped but instead pooled seam sealer applied out a spray type applicator

Red arrow - As a reminder the area around this hole and the one on the passenger side would not have any paint or primer on the untreated metal surface.

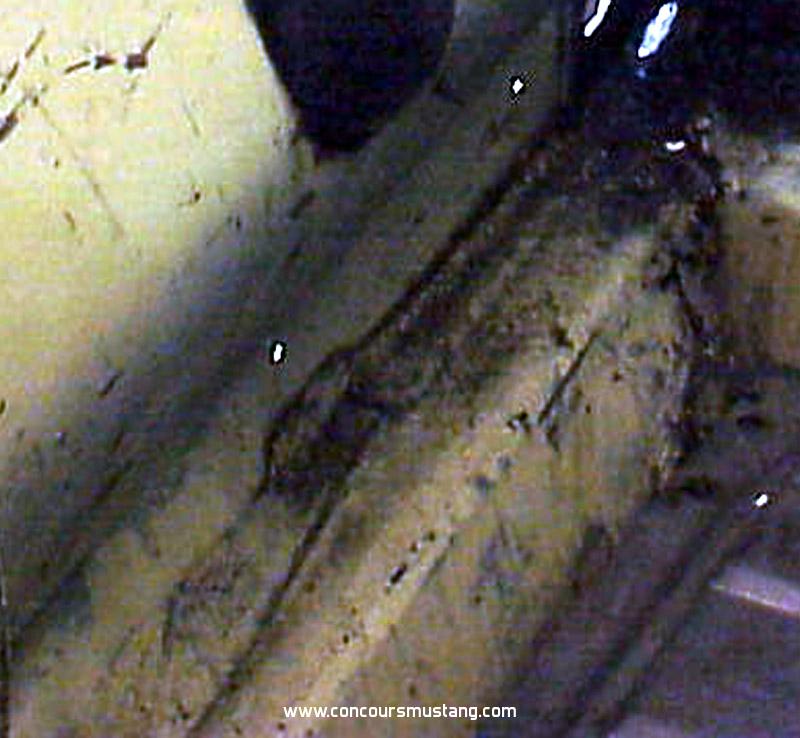
Related reference pictures


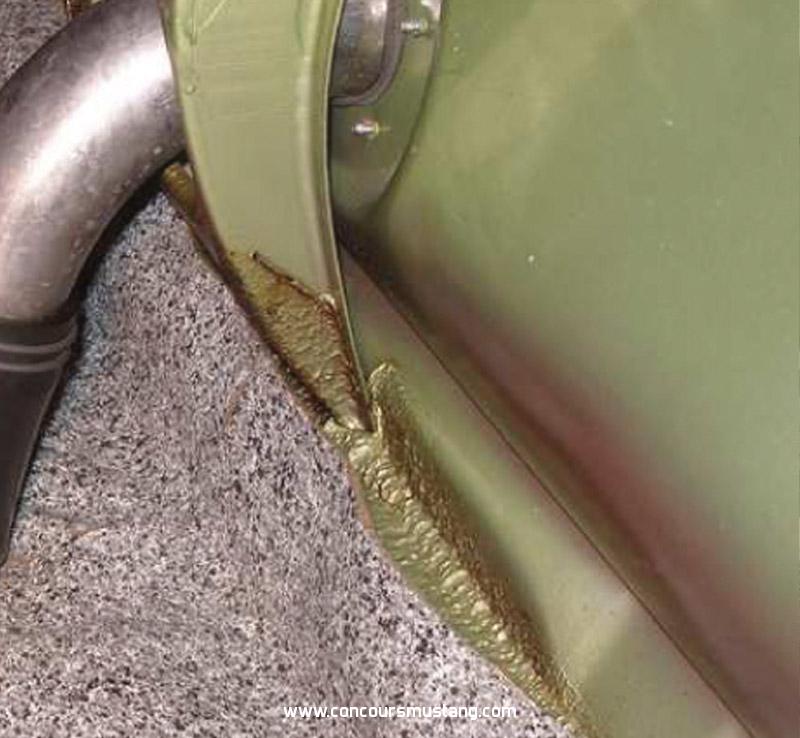
Will get to the last wheel well to trunk floor area to finish up todays requests
Jeff Speegle

Anything worth doing is worth doing concours ;)

Offline J_Speegle

  • Administrator
  • Hero Member
  • *****
  • Posts: 24546
Re: 1968 San Jose GT 390 Fastback Seam Sealer Questions
« Reply #6 on: August 24, 2019, 07:10:51 PM »
Last of the reply #13 picture review


Sealer along the wheel well to trunk floor (red arrow), along the bottom edge of the trap door surround to front floor (orange arrow)  and forward floor to truck sides/drop panels (green arrow) was applied with a thick spray sealant as shown in other sections of the trunk. Pattern could be very heavy/thick and wide due to the distance the worker held the nozzle back away from the surface. Its not usual to find the end of the pass (at wheel house to trunk side floor) to continue onto the outer wheel house outside the wheel house pinch weld by 4-6 inches and approx 4-6 inches high but not all cars were this way - likely a result of different shifts/workers assigned to the task.

Blue arrow just again shows that the worker was having problems with the spray pattern on your particular car.

Here is a poorly focused picture of a fastback forward from the time period. The seam sealer would have originally been completely covered with body color but over time it wears off and works it way through the top coat.


Another example even likely closer to your cars time period. In this example the owner has removed the sealer but it shows the basic area of surface covered by the wide spray pattern. Once sprayed it was not wiped or brushed just left to dry


Examples of a run on of spray and an example where the worker didn't. Don't focus on the other details related to the spray since these are from across the whole production year


On this one they turned the end of the pass down ward slightly before stopping


Hope this helps you and others. Maybe one day I'll get to doing an article (like I have for other years and plants) for all the cars
Jeff Speegle

Anything worth doing is worth doing concours ;)

Offline Bossbill

  • Hero Member
  • *****
  • Posts: 3271
  • In the middle of project hell
Re: 1968 San Jose GT 390 Fastback Seam Sealer Questions
« Reply #7 on: August 24, 2019, 08:52:37 PM »

Noticed that a mistake was made when they assembled your car that was caught and addressed before the floor coating was applied. Just stands out and you can choose to redo it as Ford would have planned on building the car or leave it as part of its history. Not many will see or notice the difference ;)

The pinion snubber plate?
Bill
Concours  Actual Ford Build 3/2/67 GT350 01375
Driven      6/6/70 0T02G160xxx Boss 302
Modified   5/18/65 5F09A728xxx Boss 347 Terminator-X 8-Stack
Race        65 2+2 Coupe conversion

Offline bullitt68

  • Hero Member
  • *****
  • Posts: 2164
Re: 1968 San Jose GT 390 Fastback Seam Sealer Questions
« Reply #8 on: August 26, 2019, 01:49:25 AM »
You get to fill some and leave some :) Ignore the dent


Addressing one set of pictures at a time to cut down on confusion

Great thanks Jeff
Mike
1968 Mustang Fastback GT 390 Raven Black, 4 speed
8R02S162374, San Jose, June 5, 1968

Offline J_Speegle

  • Administrator
  • Hero Member
  • *****
  • Posts: 24546
Re: 1968 San Jose GT 390 Fastback Seam Sealer Questions
« Reply #9 on: August 26, 2019, 01:53:01 AM »
The pinion snubber plate?

Yes looks like the welder missed a row and it was caught and repaired with a wire feed or arc later but before the paint section. Different but have seen oddities before. Had one 67 San Jose I helped do where the E brake brackets in the tunnel were installed in the wrong location and a second set installed correctly. First set were cut off with a torch and red oxide primer sealer over it all. Owner choose to make it all go away during the restoration
Jeff Speegle

Anything worth doing is worth doing concours ;)

Offline bullitt68

  • Hero Member
  • *****
  • Posts: 2164
Re: 1968 San Jose GT 390 Fastback Seam Sealer Questions
« Reply #10 on: August 26, 2019, 07:34:50 PM »
The pinion snubber plate?

Am I missing something with the pinion rubber plate?
Mike
1968 Mustang Fastback GT 390 Raven Black, 4 speed
8R02S162374, San Jose, June 5, 1968

Offline bullitt68

  • Hero Member
  • *****
  • Posts: 2164
Re: 1968 San Jose GT 390 Fastback Seam Sealer Questions
« Reply #11 on: August 26, 2019, 07:37:07 PM »
Yes looks like the welder missed a row and it was caught and repaired with a wire feed or arc later but before the paint section. Different but have seen oddities before. Had one 67 San Jose I helped do where the E brake brackets in the tunnel were installed in the wrong location and a second set installed correctly. First set were cut off with a torch and red oxide primer sealer over it all. Owner choose to make it all go away during the restoration

Do you have a reference pic of how it should have been welded? This is all great info and is helping so much in filling in the blanks and getting things confirmed so I don't go down the wrong path before it is too late
Mike
1968 Mustang Fastback GT 390 Raven Black, 4 speed
8R02S162374, San Jose, June 5, 1968

Offline J_Speegle

  • Administrator
  • Hero Member
  • *****
  • Posts: 24546
Re: 1968 San Jose GT 390 Fastback Seam Sealer Questions
« Reply #12 on: August 26, 2019, 08:08:28 PM »
Am I missing something with the pinion rubber plate?

Not really "missing" more of the fact that yours has visible welds that typically would not have been there. Since the snubber plate is the thicker of the two panels (rear trunk floor and snubber plate) the floor would typically show the welds more than the snubber but you can find some slight depressions from the process in the snubber in areas

If you want to change what you have the tack welds can be removed carefully, the plant attached to the floor from the interior side using plug welds where they will not be seen then reproduce a few spot weld depressions on the visible bottom - on the snubber plate would be my suggestion. Might want to check from the top side if there are visible spot welds around the four sides. If not would be time to fix that also

Yours in the upper left hand corner

Jeff Speegle

Anything worth doing is worth doing concours ;)

Offline bullitt68

  • Hero Member
  • *****
  • Posts: 2164
Re: 1968 San Jose GT 390 Fastback Seam Sealer Questions
« Reply #13 on: August 27, 2019, 02:23:00 AM »
Not really "missing" more of the fact that yours has visible welds that typically would not have been there. Since the snubber plate is the thicker of the two panels (rear trunk floor and snubber plate) the floor would typically show the welds more than the snubber but you can find some slight depressions from the process in the snubber in areas

If you want to change what you have the tack welds can be removed carefully, the plant attached to the floor from the interior side using plug welds where they will not be seen then reproduce a few spot weld depressions on the visible bottom - on the snubber plate would be my suggestion. Might want to check from the top side if there are visible spot welds around the four sides. If not would be time to fix that also

Yours in the upper left hand corner


Very interesting. Thanks for pointing that out. My understanding is that the car was raced by a previous owner. There was definitely some extra welding done as the shock towers look like they were welded at the seams for extra strength as well. I am not sure what kind of racing the car was subjected to, but traction bars were added & shock bracing was clearly added as you pointed out. In fact the lower shock plates were also welded for a repair at some point as per the photos.
« Last Edit: August 27, 2019, 02:26:13 AM by bullitt68 »
Mike
1968 Mustang Fastback GT 390 Raven Black, 4 speed
8R02S162374, San Jose, June 5, 1968

Offline Bob Gaines

  • Global Moderator
  • Hero Member
  • ****
  • Posts: 9238
Re: 1968 San Jose GT 390 Fastback Seam Sealer Questions
« Reply #14 on: August 27, 2019, 02:49:48 AM »
I have seen other regular 390 SJ Mustangs with the shock tower bracing weld like that however yours was probably added because it looks too nice like a mig welder. It doesn't really matter but I wonder if the lower spring plates were modified to clear the traction bars of the time that were bolted on the bottom side of the spring plates. I suspect this because the lower shock bolt hole is not a typical repair spot on the spring plates. There were clearance problems sometimes depending on brand. Like I said it doesn't really matter one way or the other because they are not stock regardless just a observation.
Bob Gaines,Shelby enthusiast, Shelby collector , Shelby concours judge SAAC,MCA,Mid America Shelby