"You're working smarter, not harder, and there's no shame in that."
+1 to that.
Here are the pics.. I am working on more as the project progresses...and video possibly..
I am glad to see that this thread is getting some serious heavy traction! Try finding a good article on this issue anywhere on the web. There isn't one! Up until now.. This is it! I was shocked to see how long this issue has been out there (since 2005!) and how poor the coverage of it was (Really Poor!). Well here we go.. Here are the pics. Please, All comments and suggestions are welcomed!....and yes I know this is a "Concours" website.. Point well taken. As mentioned above, This is a repair..and nothing more! Maybe 10-20 years from now a better way will be found to repair/replace this actuator using special tools without having to rip out the entire dash, Until that time, This is what we are dealing with. Please feel free to comment away..
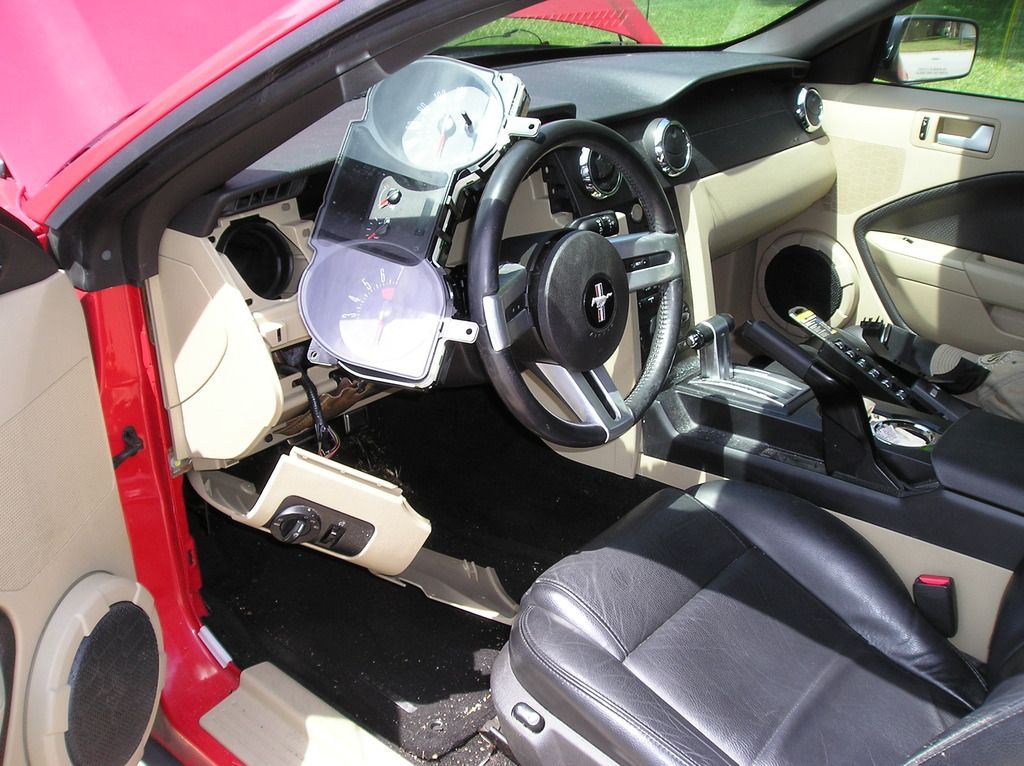
Pic 1: - This is what your S197 (2005-2009) dash will look like once you start tearing into things...(2010 may differ slightly obviously). You have to remove the screws to the trim panel that holds the headlight switch assemblies first, then start removing any plastic panels in the way.
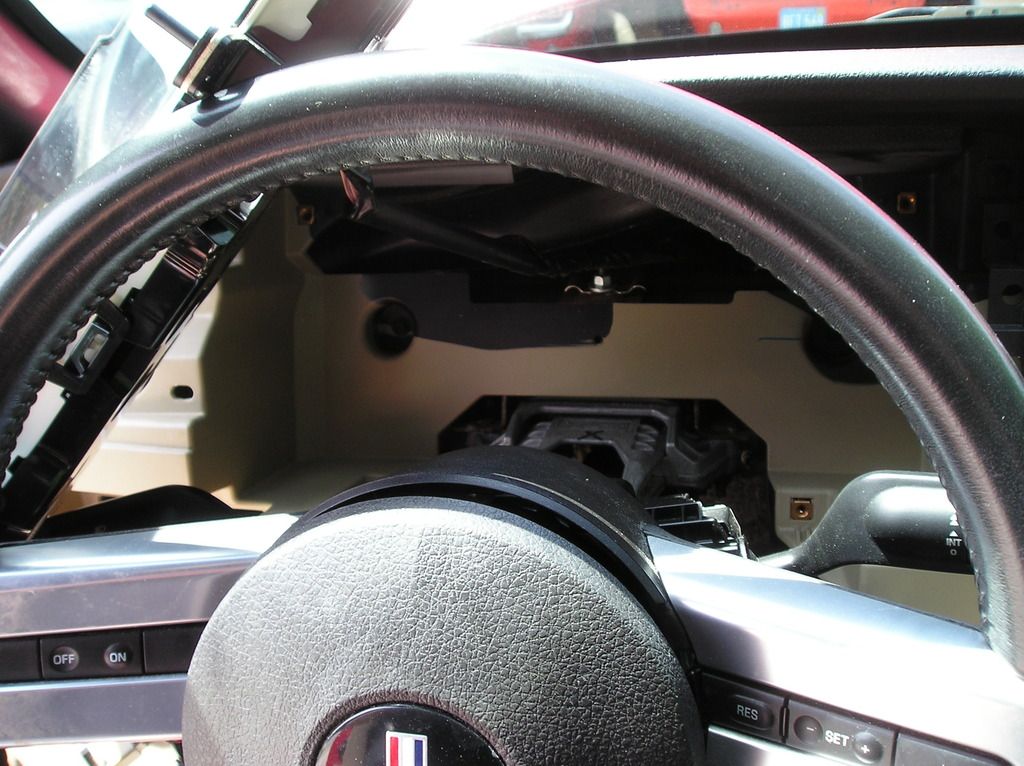
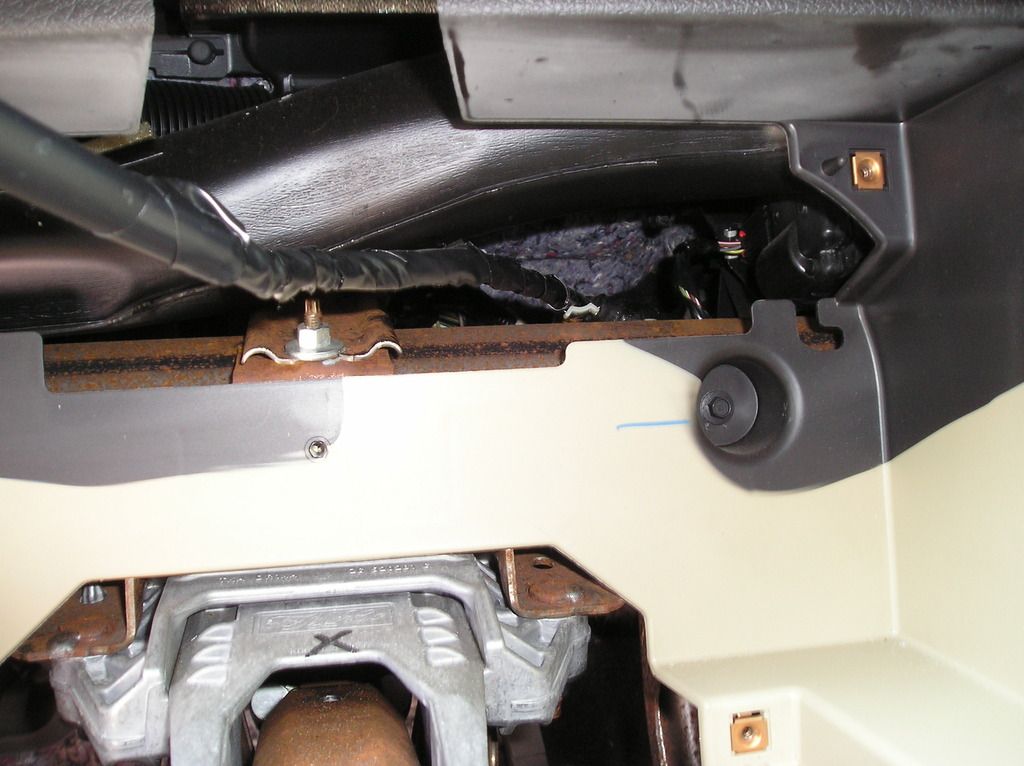
Pic 2: - You have to remove the steering wheel in order to remove the top plastic column piece - Make sure that your battery is disconnected here to avoid any accidental Airbag Pre-detonation! On each side of the steering wheel column, there is a small plastic bolt cover, remove it from both sides and remove the bolts. This enables you to remove the airbag, but leave the Airbag wires attached and just move it to the side (the airbag/horn assembly will slide away to the side while you are leaving it connected), Now you can take the steering wheel off by removing the center bolt. Take out the center bolt and remove the steering wheel, but just balance the steering wheel with your legs (or on your legs) while the airbag is still attached. You'r only doing this for about two minutes...so don't fret. With the steering wheel off, Now you can remove the next two pieces. Lower the column as low as it can go by using the column adjustment pull lever below the column, Put the column down all the way as far as it can go. Remove the top Black Plastic column trim piece. Now remove the Dash Cluster trim Bezel behind it.You should now be looking at the bare dash cluster assembly. It is held in by four small hex screws. Remove them, and move the Dash Cluster bezel to the left side to get it out of the way. What you are looking at now is the Bare Dash. You've gotten everything out of the way, Now it's onto the problem child Actuator. Look all the way to the far right behind the dash. Use a flashlight. You will see a Heater Plenum tube (ABOVE), a Dashboard Stability Metal Crush bar (Below), and the Heater Airflow Actuator and wire (to the very far right) - See the next 3 pics... Also, The steering wheel here is not bolted on and "hanging by a thread" It's just sitting on its hex nub that the bolt - bolts into. I had removed the bolt earlier..
Pic 3:
Pic 4:

Pic 5:
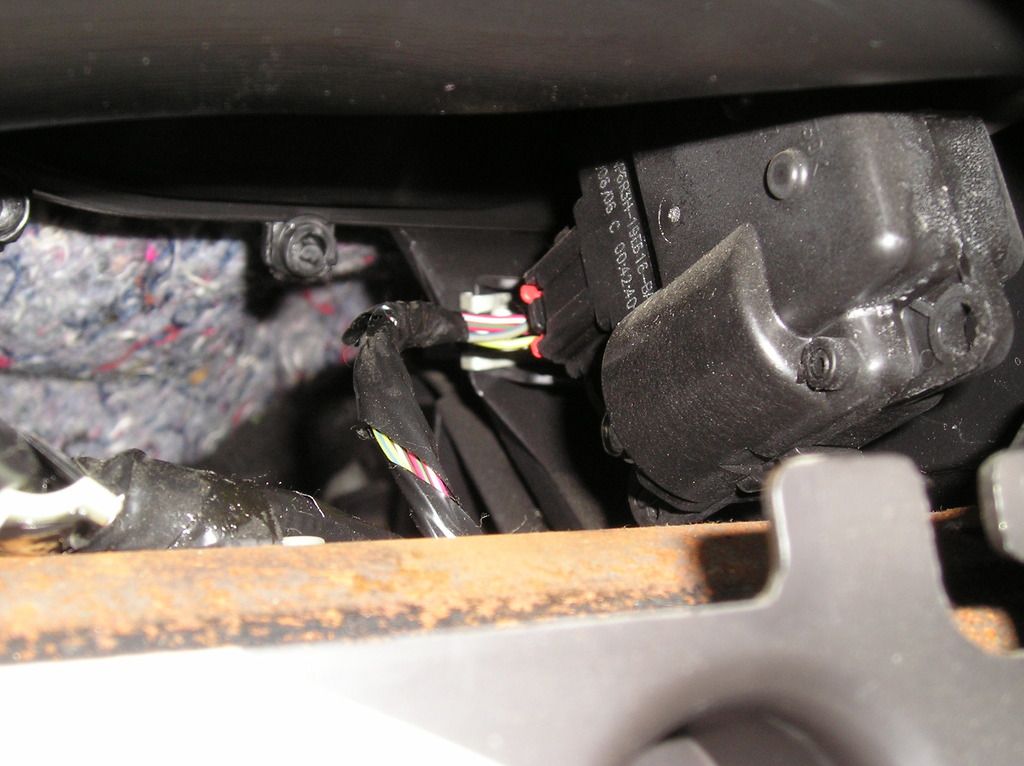
Here is a Close-Up View of the Upper Right Corner. You can plainly see the Actuator that must be removed. If you look hard enough, You can see the lower 8mm hex screw that holds in the center bottom portion of the actuator. Get a 8mm socket and remove this screw. Once that has been done, Now the actuator is ONLY held in by a 2nd corner screw ONLY now. You can't get to the screw, so have fun trying. I literally spent over an hour and used every 8mm tool known to man - You literally can't get in there with a 8mm socket because the damn upper Heater Plenum Plastic tube is slammed right onto the 2nd Top Hex Screw, and I finally figured that just breaking the corner of the actuator was really the best bet going to get this puppy out, so that's exactly what I did! (At least It was planned!..lol..), I just grabbed the actuator and slowly moved (rocked) it back and forth and at the same time, I removed the attached Plastic Actuator arm on the back of the Actuator from the slotted actuator latch located in the dash in the side of the heater plenum (piece of cake), and the corner of the Actuator purposely broke off and the actuator was now out in my hand...but the wiring was still attached so I had to remove that next. There is a RED Plastic safety clip that holds in the plug. Get a small micro flat head screwdriver and back out the red clip slowly. Save the RED clip for later use. The plug will come out now and the actuator is now FREE! HOORAH!
Geez, Have you ever seen so much Surface Rust behind a dash on a 2007 car?? I think my '65 and '66 'verts have less.. LOL....and I baby this car..Well, Ok, I drive the tar out of it.. but I maintain it well, and it's got 79,000 miles on it...Not bad for a 2007. Do you ever think that after 50+ years of Ford making Mustangs that they would ever use any kind of coatings on the bare metal behind the dash?? If they haven't by now, Probably Not. It might be something to bring up at the next Ford Board of Directors Meeting..lol... I'm betting that all the bare metal behind your S197 dash looks just like mine.. Take a look someday.. You may be shocked...lol.. Anyway Enough levity for now....
Getting back to the issue at hand..
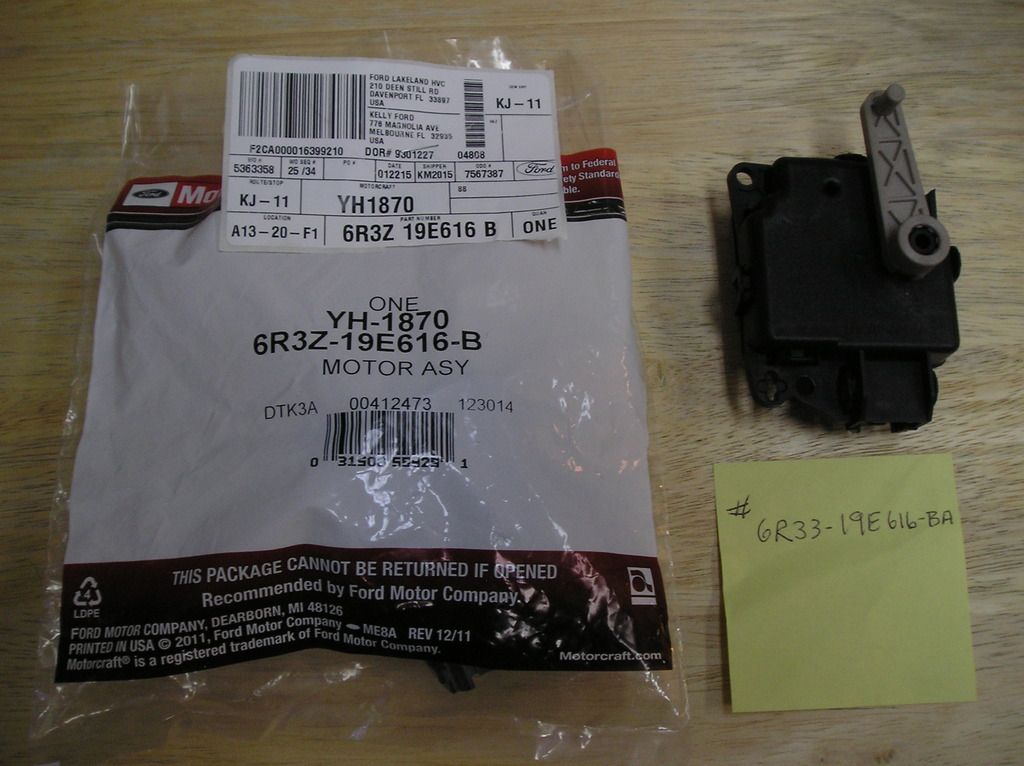
The 2nd Top Hex Screw with the old broken corner piece of the actuator corner is still up there, but we'll get back to that in a moment. Right now, Go to the web and/or your Ford Dealer and order the correct actuator! See the pics below:
Pic 6:
Front of New parts bag (Left) and old broken Actuator (Right)..
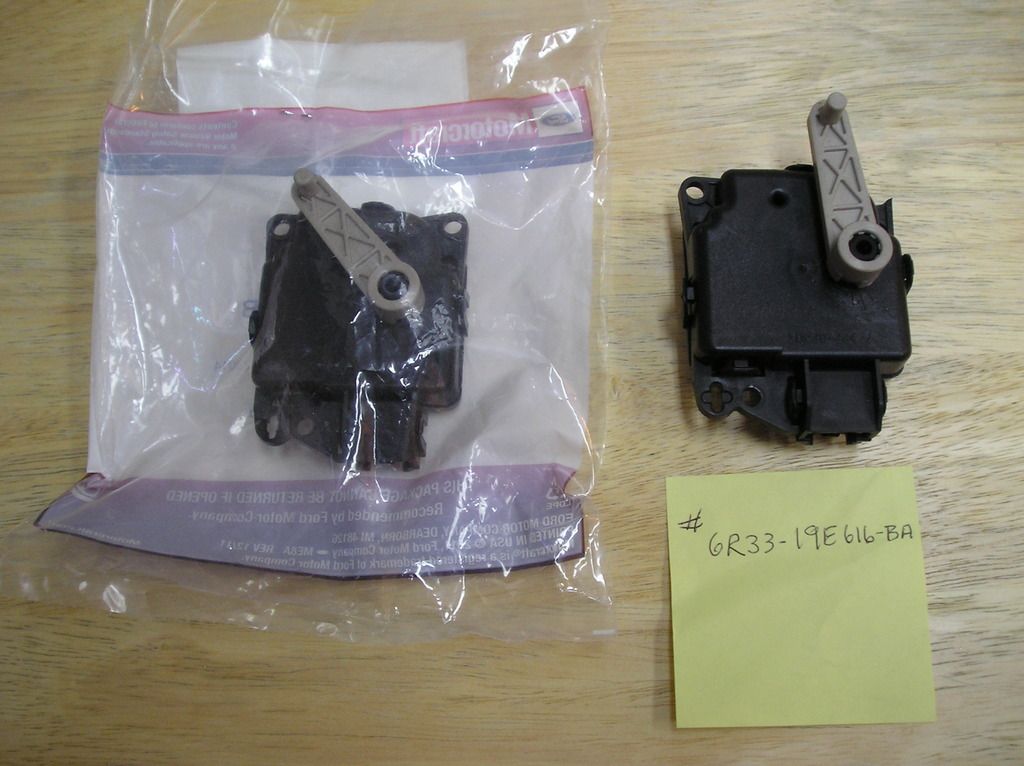
Pic 7:
Rear of New parts bag (Left) and old broken Actuator (Right)..
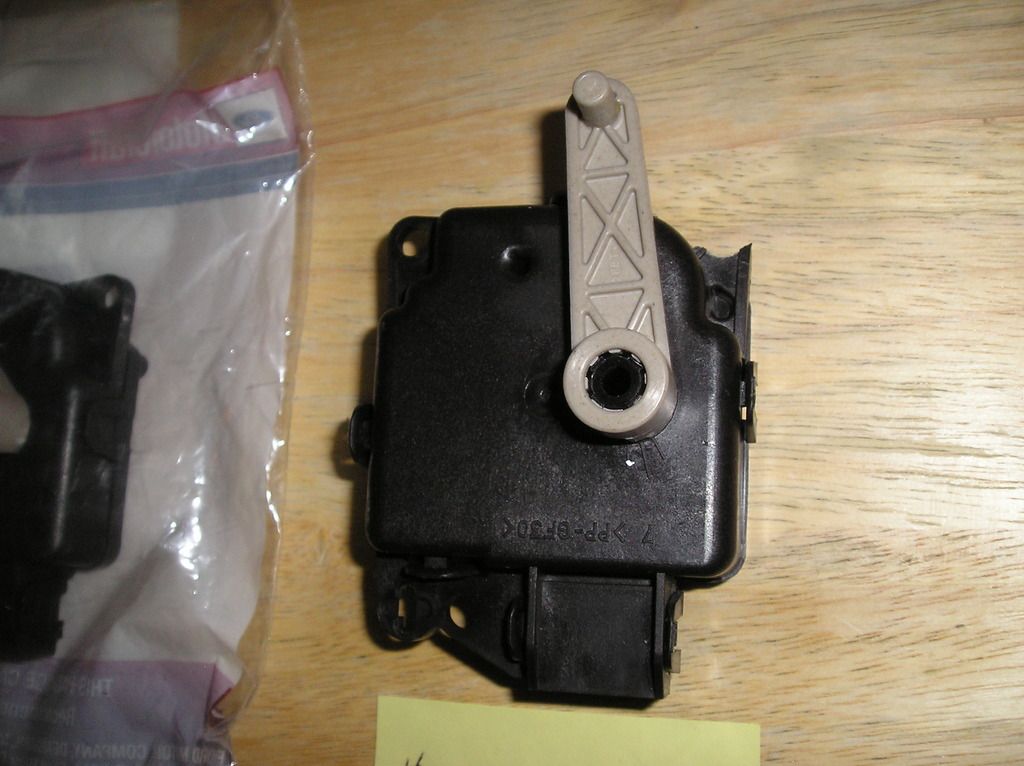
Pic 8:
A Close-Up of the old broken Actuator (Purposely Broken off corner on Upper Right)..
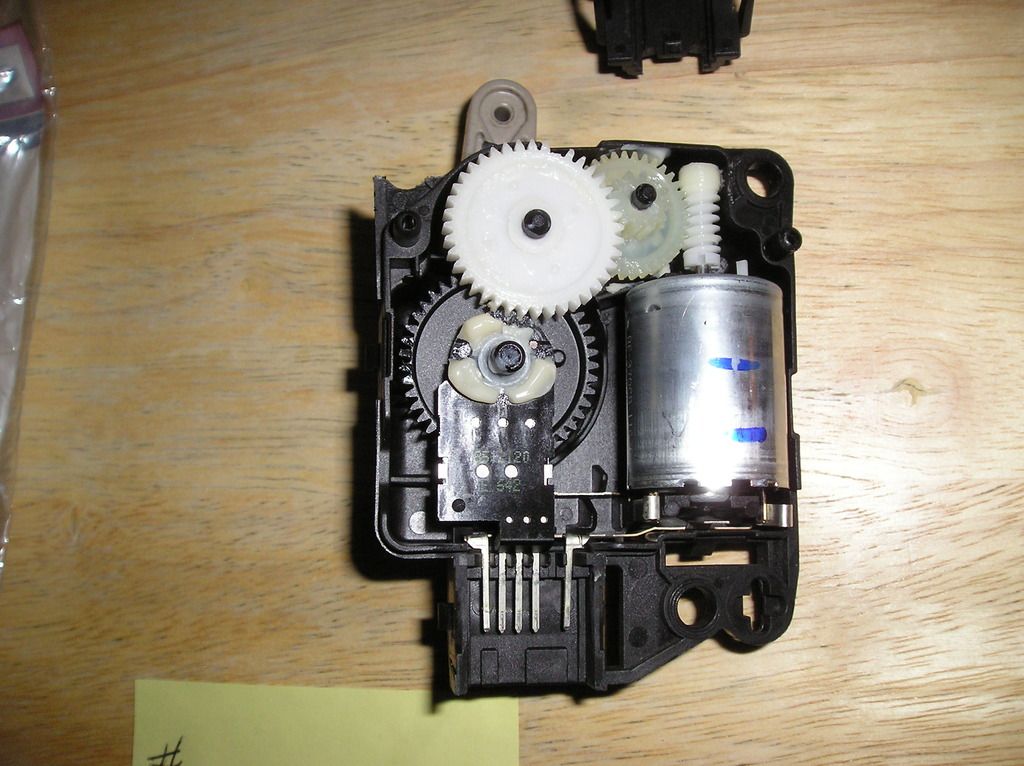
Pic 9:
Another Close-Up of the old broken Actuator (Purposely Broken off corner on Upper Left now -Simply Filpped over with cover removed)..
Take a good look at the inside of the Actuator and you can now see why these things don't last. Look at the White Nylon cog on the Uppermost left...See The missing Teeth?? It's stupid crap like this that gives car companies a bad name. A 35 cent broken piece on a $40,000 car = lots of trouble that could have been avoided. I would "assume" in the future that "Someone" - Scott Drake (AHEM!)...will probably come out with a light alloy cog replacement set to replace the cheap Nylon Plastic cogs that are in there. The actuator is actually a Serviceable unit believe it or not! See Pic Below..
Pic 10: THE PLAN:
Ok, Well Now, Up to this point I've been winging it as I go..and so far so good!...No major issues...Yet...
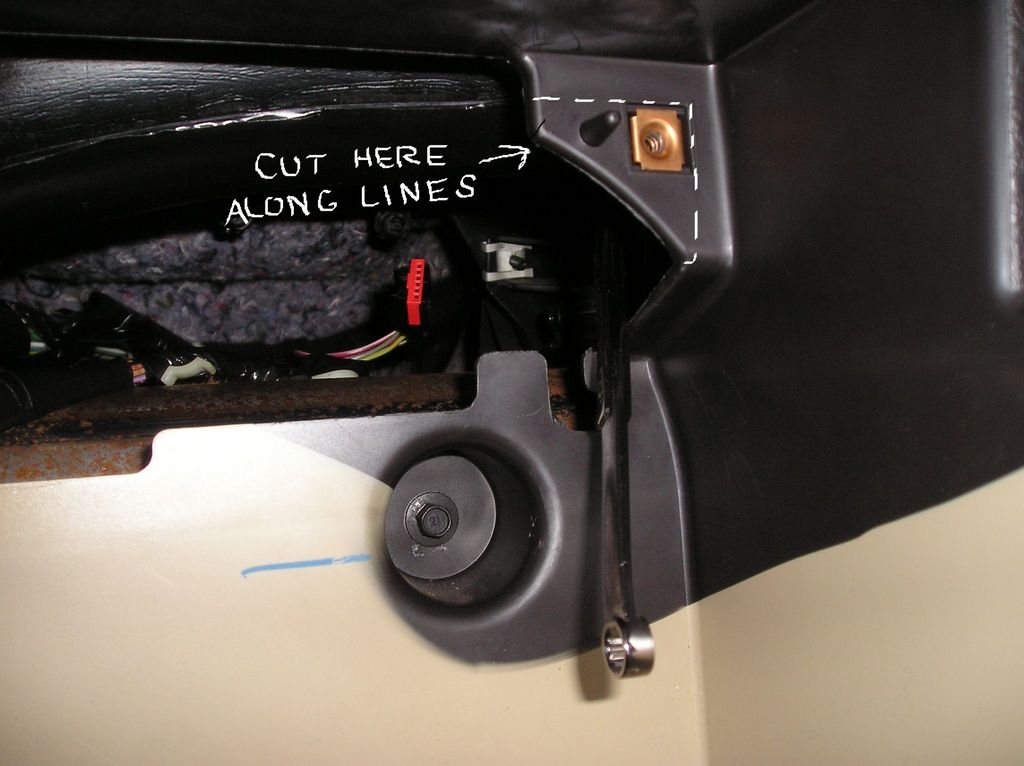
The 2nd Top Hex Screw with the old broken corner piece of the actuator corner is still up there...Remember that?? Well, Now that the old Actuator is now gone, It's now time to remove that hard to get to nearly impossible (not kidding) 2nd Top Hex screw. Even with the Actuator gone now, Because the damn Heater Plenum Tube is so wide and still in the way, There is literally NO WAY to get a small 8mm Socket with any type of extention in there.. Believe me, I tried...and tried..and even tried some more!..and I don't give up easy! What I did gladly happen to notice though was I could get my thin closed loop 8mm wrench in there, and get it onto the hex screw, but I had absolutely NO THROW to move the wrench back and forth to remove/re-install the hard to get to 2nd Hex screw. So What to do?? CREATE THE THROW. Here is the plan bellow... What do you think?? Got a better idea?? I am all ears on this one.. I plan to get my Dremmel tool with cut-off wheel and Cut Along the dotted white lines below to Create the wrench throw that I need to complete the project. As you can Plainly see, I'll have to lop-off the top right screw hole/nut that help secure the upper right corner of the dash cluster. 3 out of 4 screws ain't that bad I guess, but what I'll do is secure the existing hex screw that goes through the cluster with the cut off hole/nut for a complete uniform look...and from the front of the dash cluster...no one would even know a cut has been made...Well, That's the idea... All comments Welcomed! This is Currently a Free-Flowing process and is subject to change at any moment! Suggestions??? See Pic! :
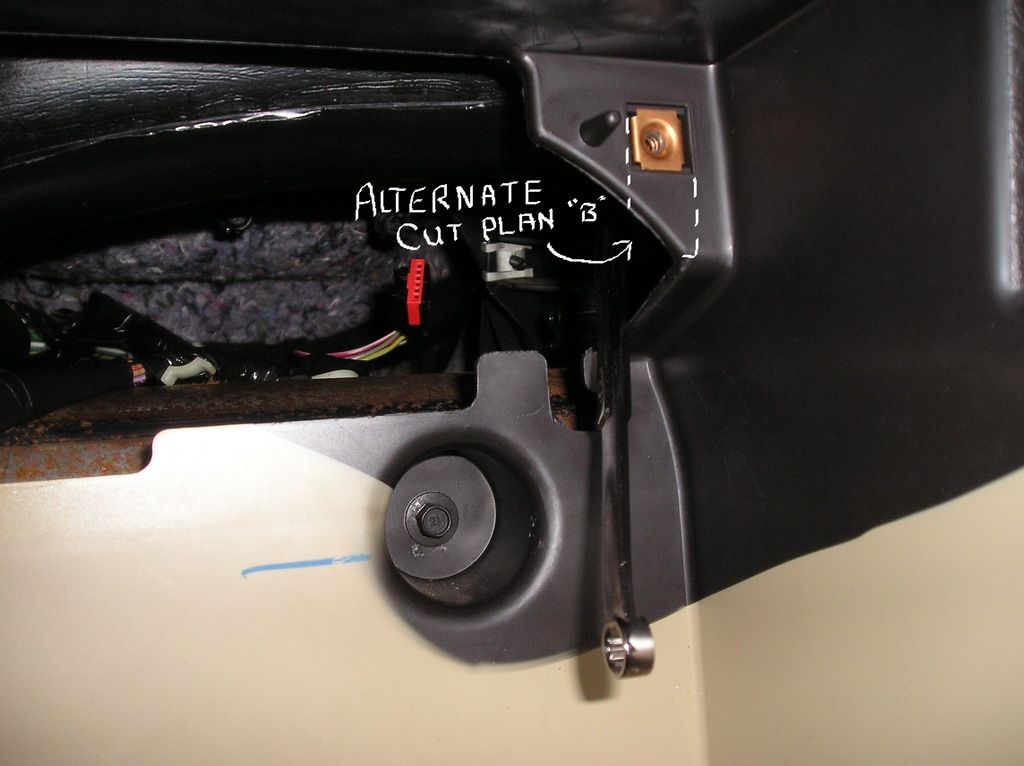
I was kicking this around as well to get the job done..by cutting a bit less..It's harder maneuverability with the wrench though..but might work OK as well.. I would remove the nut here as well, but put it back when it came time to button everything back up after the Actuator is installed... Thoughts?
Alternate CUT-PLAN "B" :
Also, After this "Behind the Dash" Airflow Actuator project has been completed, I will also get pics and info on the other remaining A/C Actuators underneath and Behind the Glovebox to round-out and "Complete" this thread. The "Behind the Dash" Airflow Actuator is obviously the hardest to get at Actuator out of all of them. The others are hard, but not that hard. We'll cover those much later..
More To Come!
Stay Tuned!

)
Tony K.