I'm starting this thread to talk about the Caswell CopyCad process including the various chromates you can use.
The system I'm using is a self-created version of the 1 1/2 gallon system of CopyCad.
If I add up everything I'm close to $500. Consider this before you think you can plate with just their starter system.
If you buy everything from them the basic system includes: 2 x 2 Gal Plating Tanks & Lids
2 x 4" x 8" Zinc Anodes
1 Pack Copy Cad?/Zinc Part A & B (Makes 1.5 Gals)
Zinc Brightener
1 Pack Degreaser (Makes 4 Gals)
1 x Agitation Pump
Abrasive Nylon Wheel
The Caswell Plating Manual
Free Technical Support
Not sure what happened to their BS transformer they use in the basic system
I did not buy this kit, rather I bought parts of it.- I sourced five 2 gal buckets from HD or Lowes with lids.
- The zinc anodes were instead a roll of zinc anti-moss for roofs.
- The degreaser is just a capful of general degreaser mixed in water.
- The pump is from an old aquarium.
- The manual I got online.
In the end I bought the following items from Caswell- Copy Cad A&B
- Copy Cad Brightener
- Yellow Chromate
- Olive Drab
Other items you require:- DC Constant Current Power supply 10 amp suggested; 5 amp min?
- Bucket Heater (1000-1500 watts)
- 3M base mask with Acid Fume cartridge
- Eye Protection or shield
- Really good venting (I sourced a used fume hood to outside)
- Various Thermometers (Candy style works)
- Aquarium Heater
- Digital or paper PH meter/paper
- 2 ft Copper pipe
- Dozen or so 12-16" test leads (you will dispose these during use)
- Copper wire (18 ga or 16 ga) and cutter
- Hot plate and stainless pan or deep skillet to heat degreaser
- Quality hand pump sprayer
- Gallons of distilled water
- Muriatic Acid (Brick/Fireplace Cleaner)
- Baking Soda (base)
- A gross of thicker (10mm) chemical/acid proof gloves
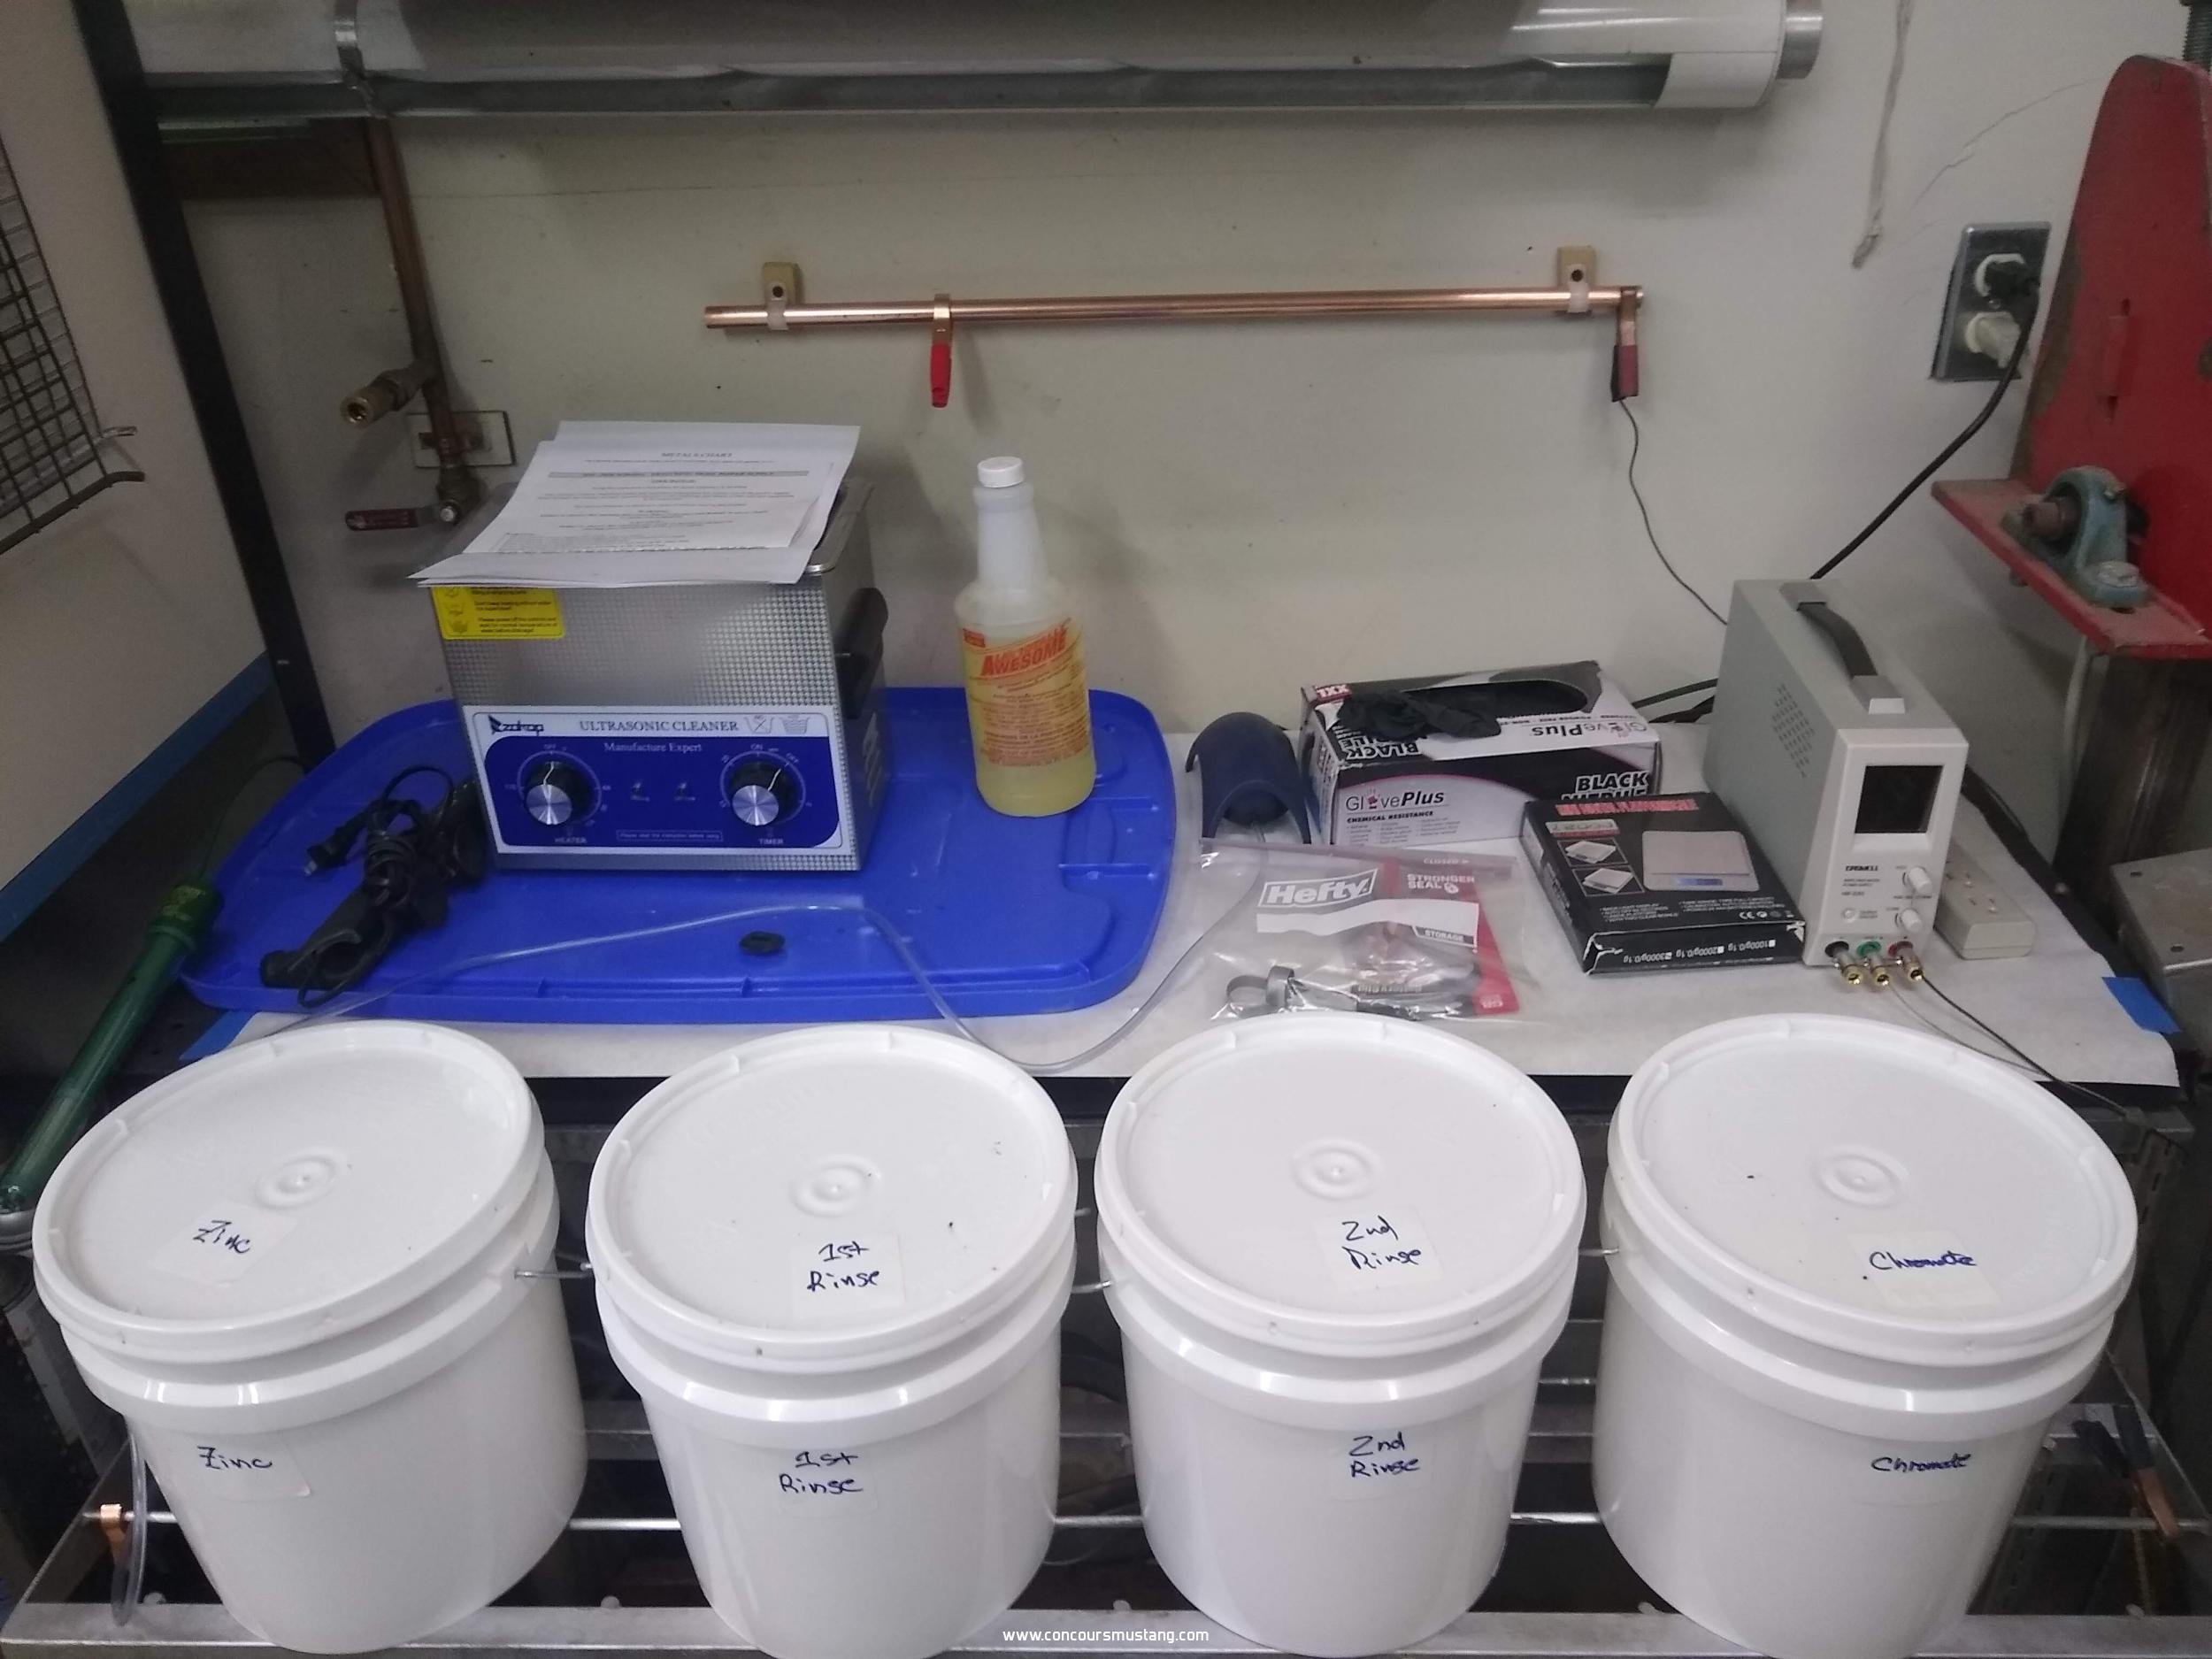
Here is my setup:
From left to right:
CopyCad Mix
Distilled Water Rinse Bucket
5% Muriatic Acid in Distilled Water
Yellow Dichromate Mixture (Zinc Dichromate)
In the background is my Digital CC Power Supply (PS) and an ultrasonic cleaner.
On the floor is a bucket into which I spray distilled water on the part after a rinse in the rinse bucket.
Let's start preparing the item to plate.Everything must be cleaned. Old Cad removed. Media or vapor blasting is used and possibly wire brushed.
Cleaning sequence
- Use your favorite solvent to clean up greasy parts. I use Stoddard solvent. Use gasoline if you are tired of living.
- If Cad or still a little rusty, acid bath in 100% Muriatic acid until all bubbles stop. Note! The fumes given off by the CAD bubbling off are noxious and dangerous. Wear your acid mask!
- Dip in Baking Soda and distilled water solution until bubbles stop
- Either vapor blast, glass ball media blast or use a dedicated wire wheel to get part shiny
- Rinse in distilled water
- 140 degree degrease for 10-15 minutes
- Rinse in distilled water -- check for overall sheeting action on part
- Ready to plate
If you see where I'm going here, parts have to be very, very clean prior to plating.
Next we'll prepare the CopyCad solution and get ready to plate. Yes, it took this long to get each part ready. No wonder you wanted to send it out.

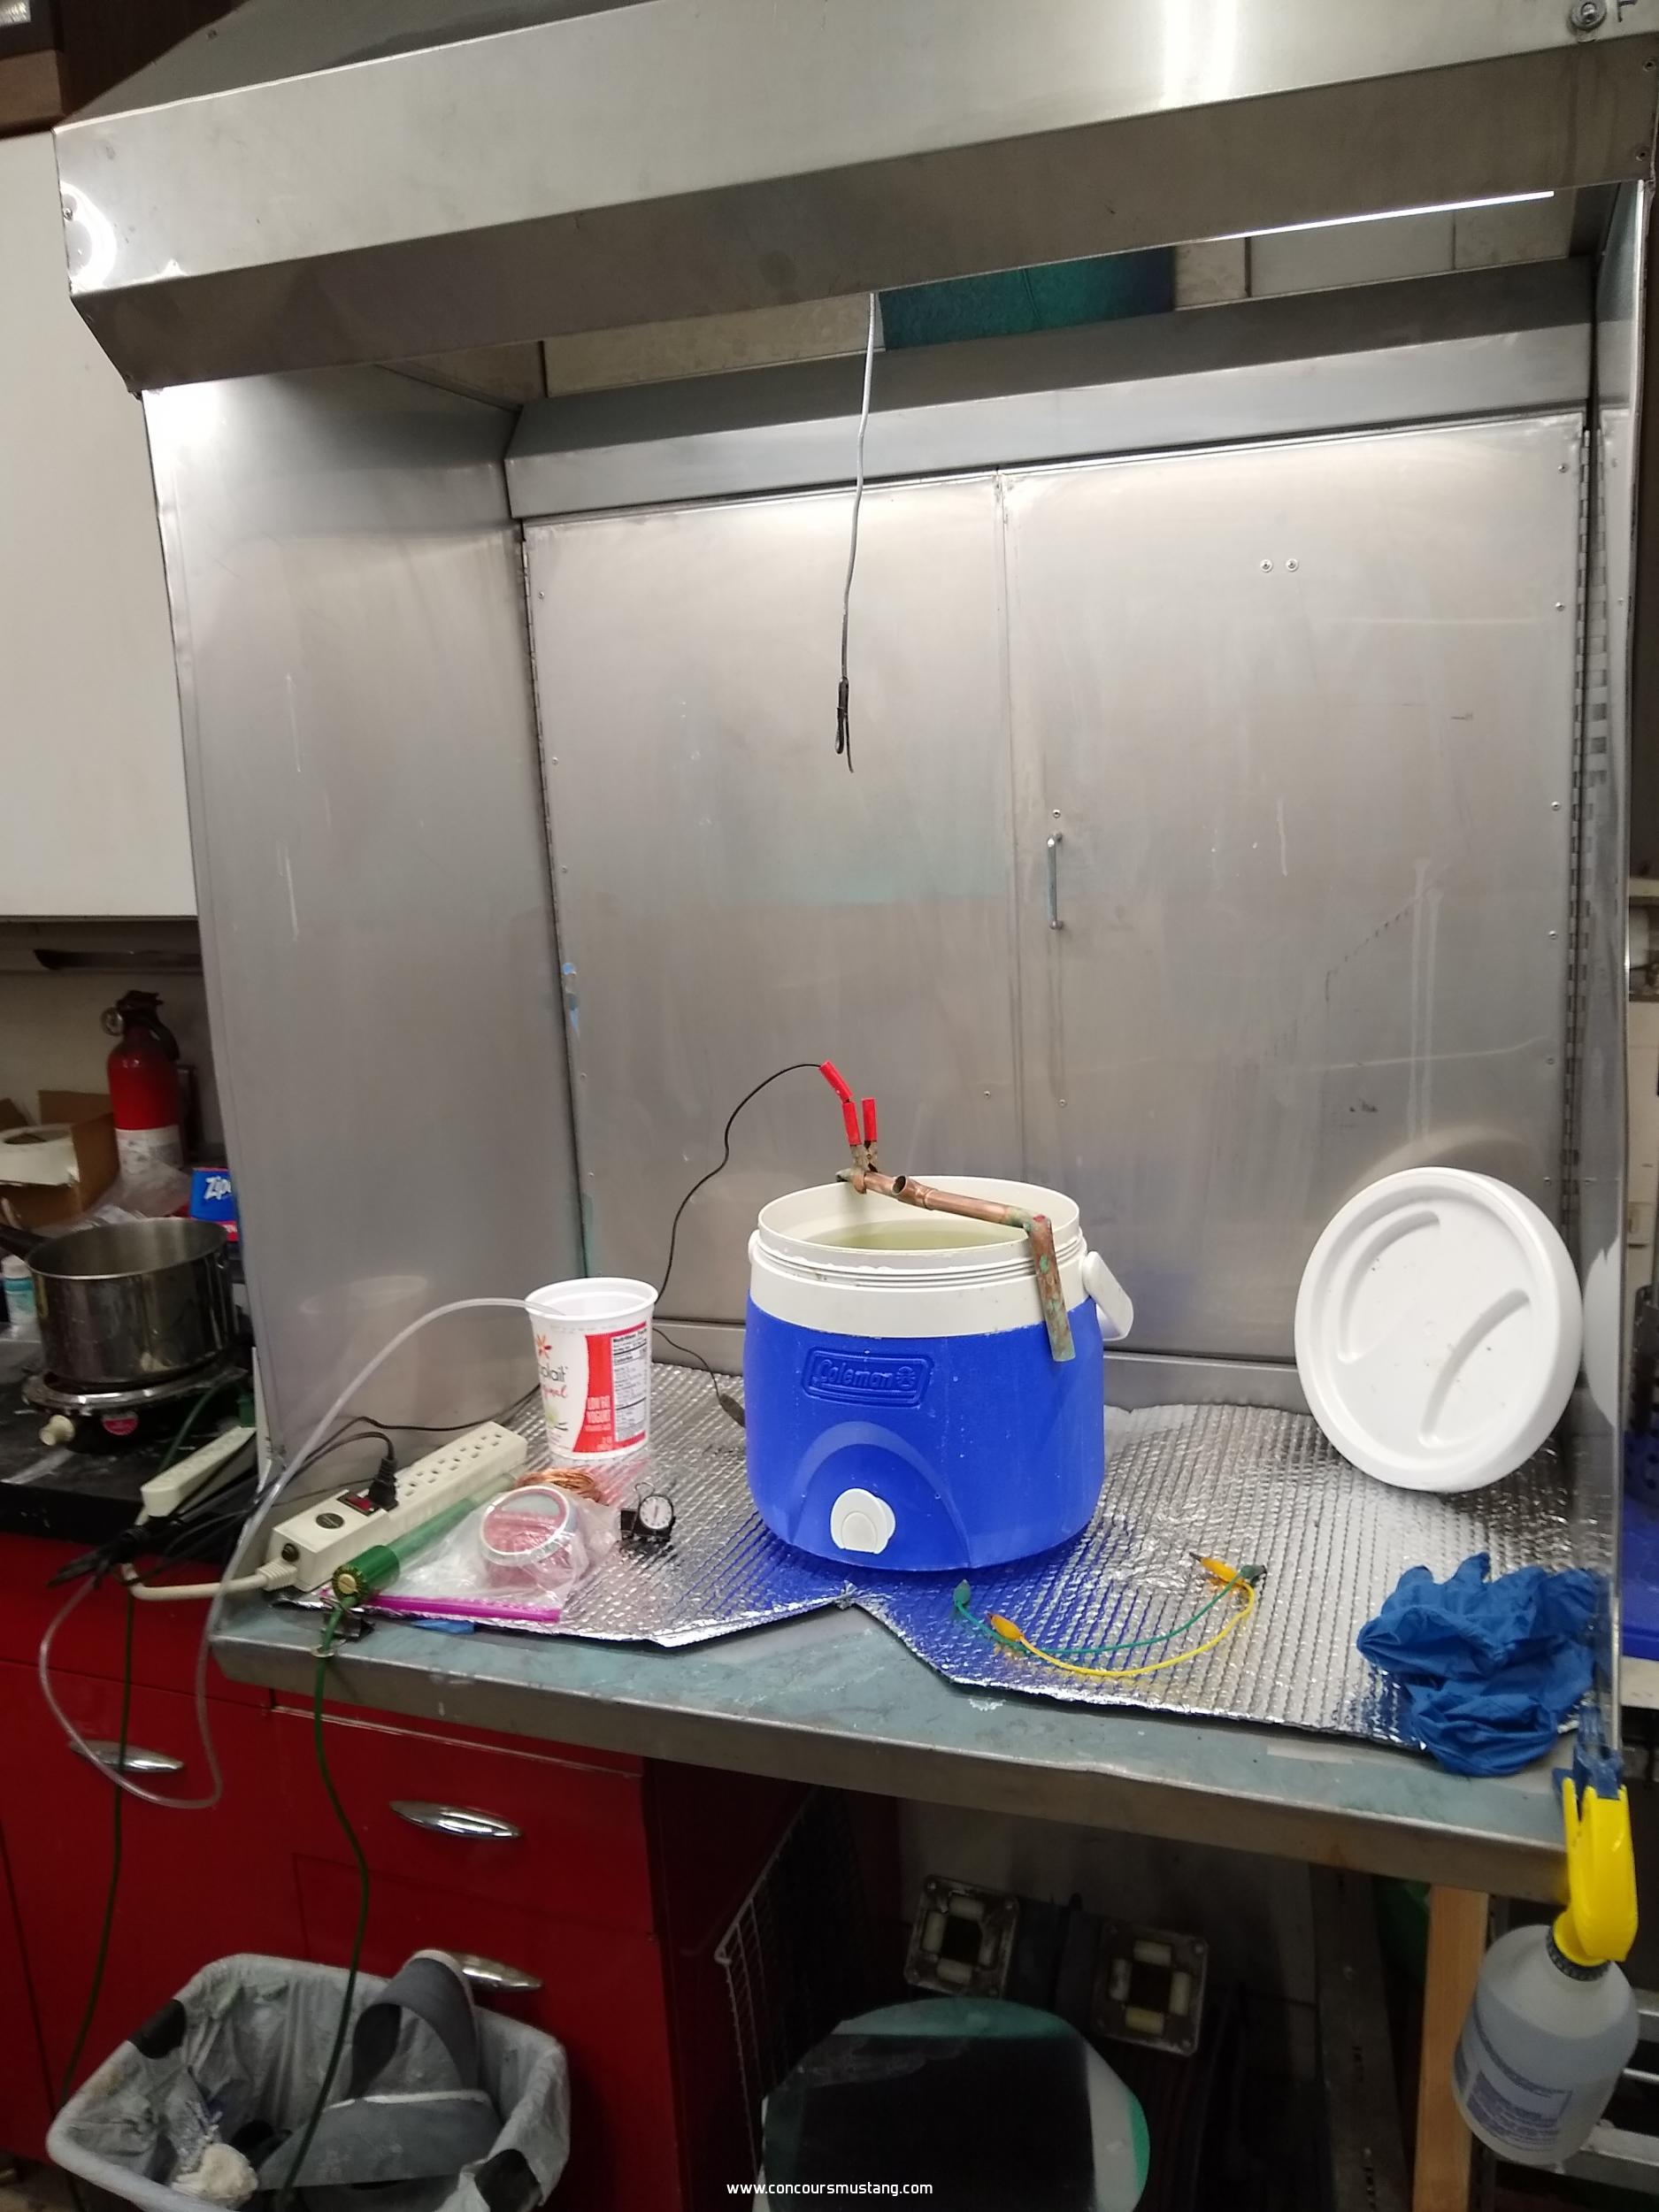
Since the pic of the lined up buckets I moved the CopyCad mixture into a fume hood.
Because the earlier CopyCad mixture requires 110 degree I sourced an insulated drink container (2 gal) to keep the mixture hot.
The hood is next to the other buckets. I still use the acid mask while the hood is working.
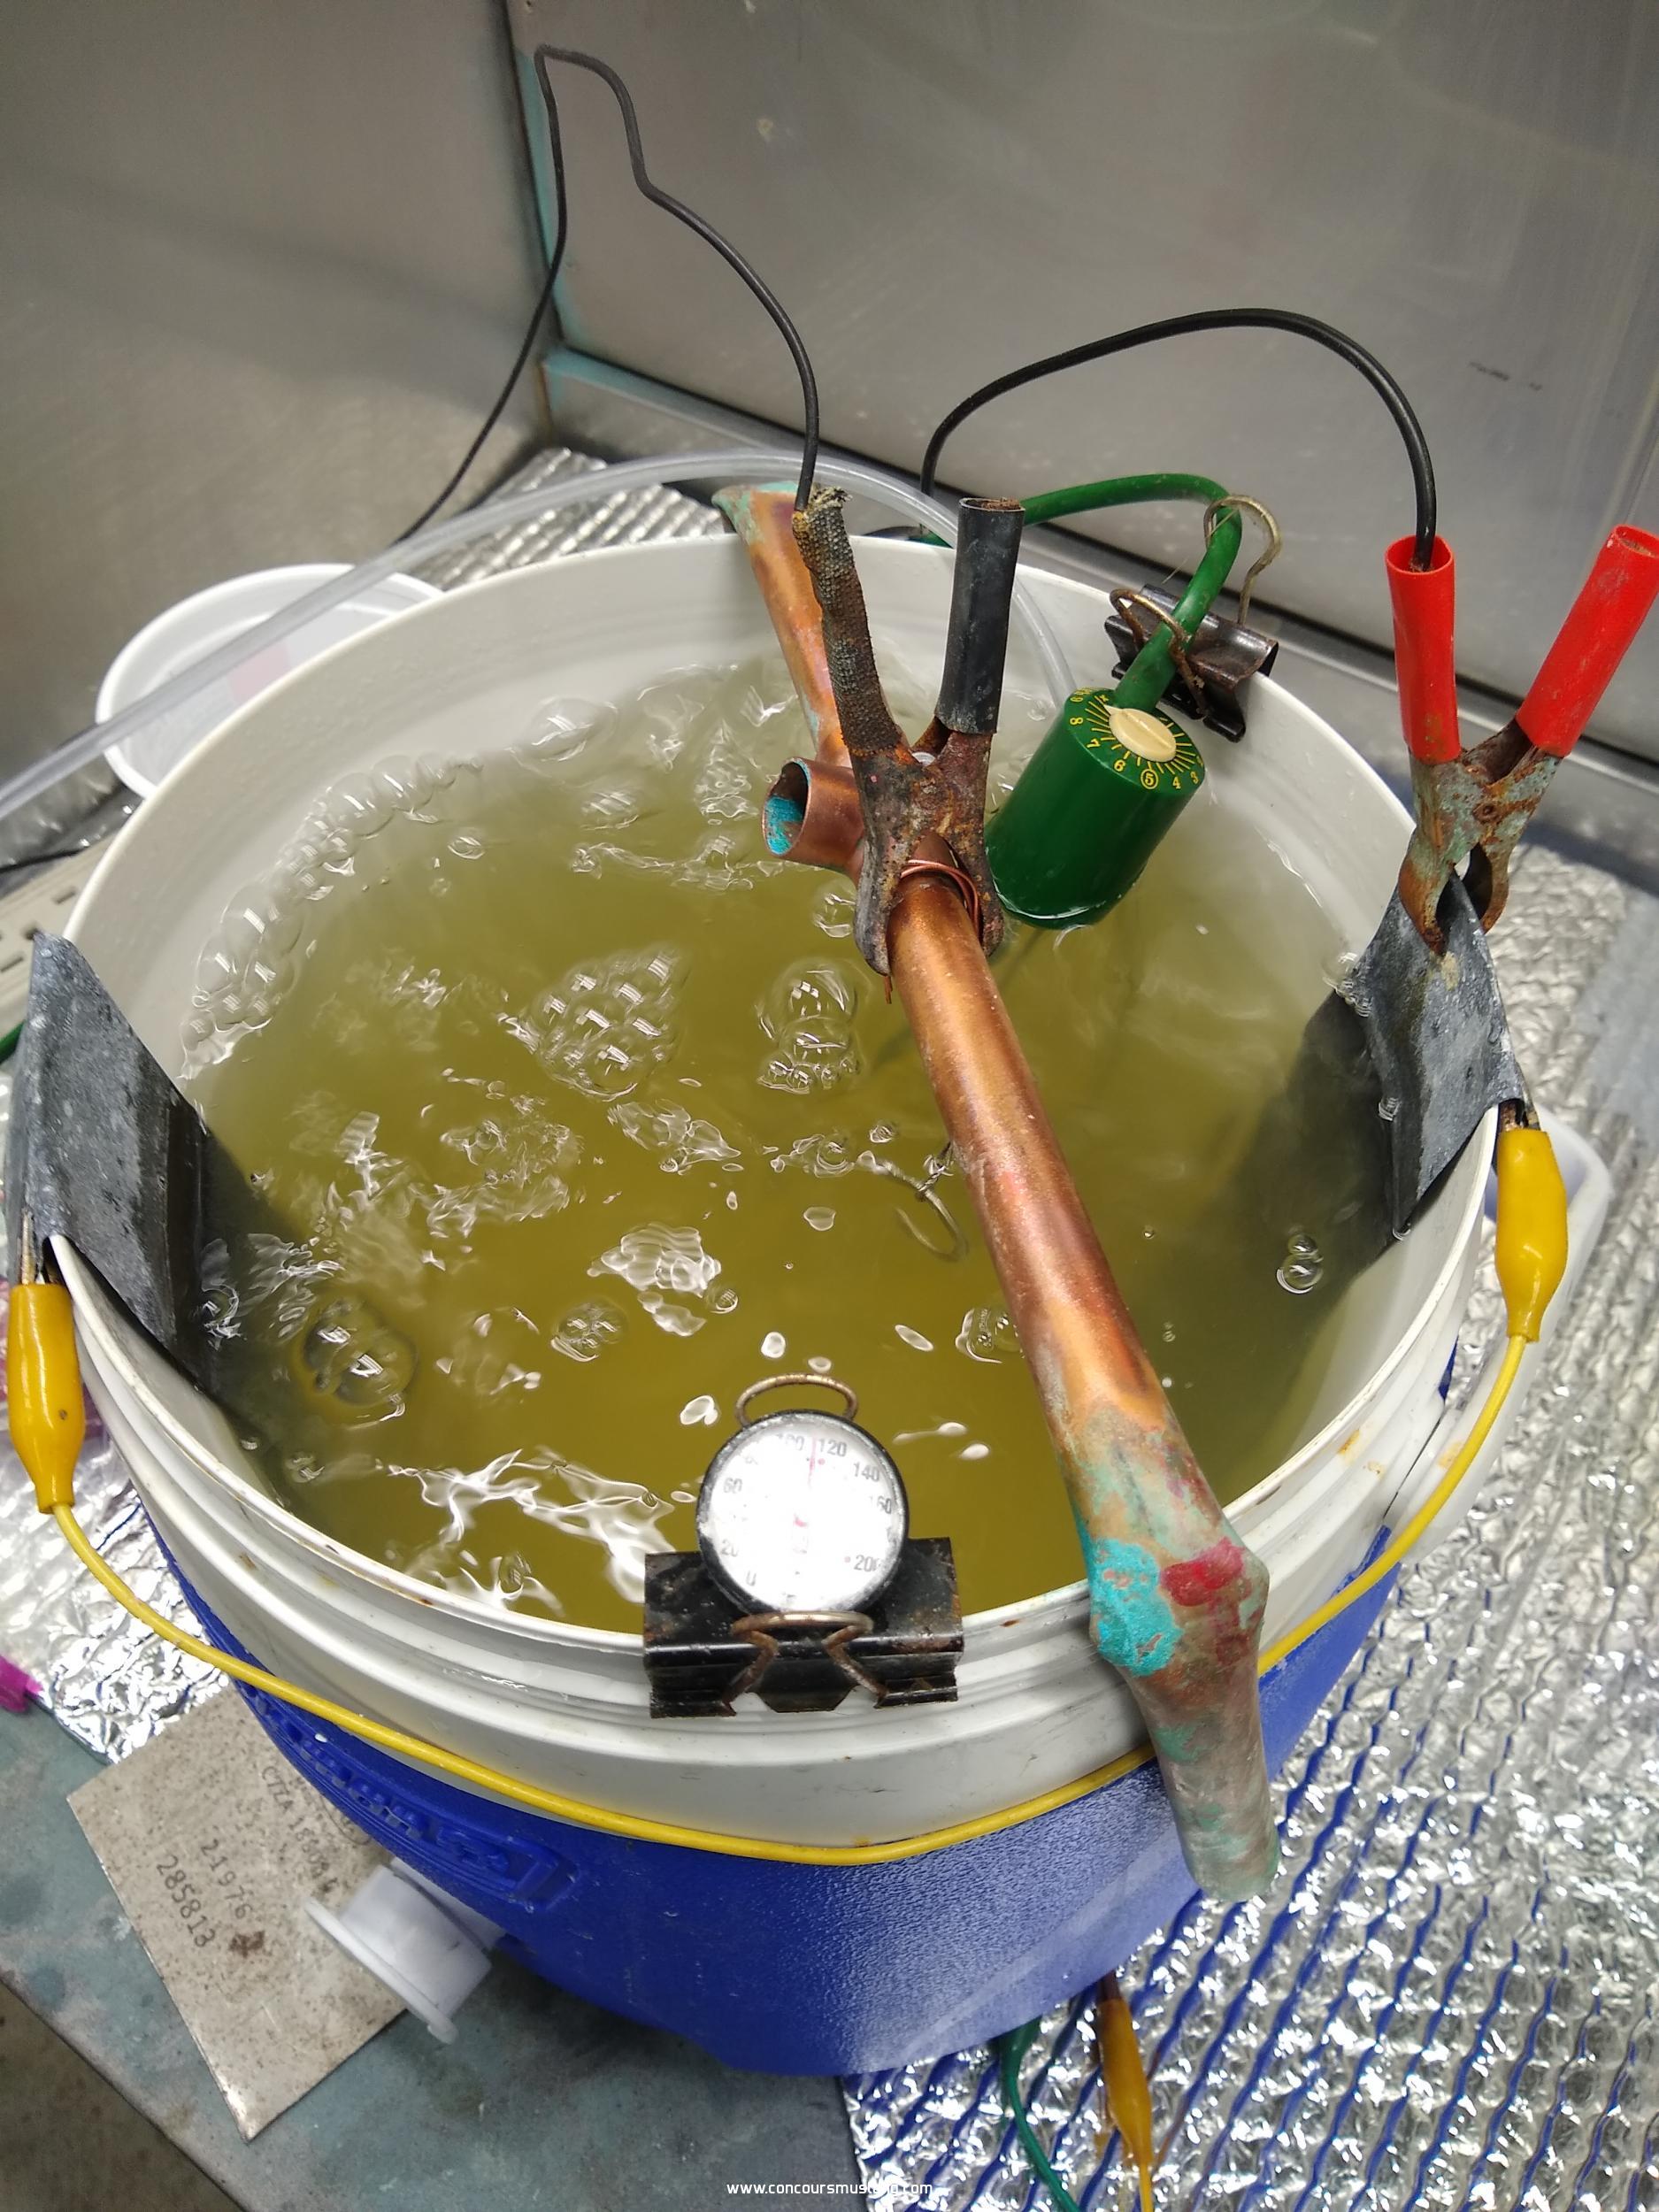
Setup of the CopyCad Bucket in action:
The two pieces of zinc (anode) are bonded with an electric lead. The large red lead to the PS (+).
The copper pipe has bent over ends to stabilize. The part is copper wired to the pipe.
The small clear line is an aquarium bubble producer. Place it to the side.
The large green item is the aquarium heater.
It's plating time!You need to read the instructions on your PS on how to set it Constant Current (CC). When used in this manner the voltage is set at around 3V initially and the output amperage is set for plating an item of a specific size. The voltage will change but the amperage will stay steady during the plating process.
Mix the CopyCad according to the directions. Use only distilled water. Cut your zinc (at 99 percent pure) to the height of the container. Make two and bend them over the lip of the container. Take out a alligator test lead and join them on the outside of the container. The red lead of the PS goes to the zinc or anodes.
Bend a copper pipe to bridge over the edges of the container. You will need to clean this pipe often. Other alligator or battery terminal clips will join the negative lead of the PS to the pipe or the copper line leading to the item to be plated.
The process itself is simple.
- With a bucket heater bring the CopyCad temperature to about 110 F
- Remove the bucket heater and insert the aquarium heater
- Rig up items to be plated on 18 ga copper wire. keeping them apart
- Set your amperage with CC switch open
- Hang the copper wire onto the copper pipe in the middle of the container. Do not allow the copper bar to touch the anodes!
- Turn on the current switch and watch the bubbles
I add this MP4 of the "fizzle" here, but I can't guarantee it ill stick around as it;s a link to my personal Google account.
https://photos.app.goo.gl/Lw6ELp6cv1F5cLYS6The bubbles are key to this process. The documentation had many formulas on square inches of the item and the amperage to set the power supply for this square inch item. What actually works is to watch the item in the soup so that it fizzles slightly from the wire forming a small ring at top and that the item also fizzles or bubbles lightly.
Once the item is fizzing correctly start up aquarium bubbler.
Bright Cad requires you to add 1/2 teaspoon of brightener. If you don't you will end up with dull Cad or a dark finish.
Small nuts only take about 5 minutes. You can pull the item out to check for how it's going but if you do so with the copper wire hooked up you tend to fry the last item on the wire.
I'll update this with more and correct it as we go along, but this should get you started.
The hard part is figuring out what went wrong, because it often does!
Also we will deal with chromates in a future post.