Lets see if this will help rather than going through your list one by one. This is going to be long - but these always are.
On front wheelwells on Dearborn any year we tend to see a combination of three (well really four but will hold back on the last) colors.
1- The paint/primer sealer used on the front frame rails and up the outer surface of the inner fender panels and shock tower. Applied from the firewall forward - from where the floor color started - forward
2- The next application (paint) would have been the body color. Dearborn painters often got carried away and would apply the body color much further than really needed - forward of the firewall, sometimes all the way to the radiator support. On the inside of the engine compartment and top edge, where the fender would attach, didn't really matter since it would be covered with the engine compartment black but in the wheelwell much of it would remain without a paint over coating - leaving it visible in places through the wheel well
3- Another painter applying the engine compartment black would have coated the inner surfaces -firewall, inner fender panels, visible fame, visible sides of the lower attachment brackets, back and front side of the radiator support as well as the upper lip where the fenders would attach. This last process would produce some black misting or overspray onto the upper area of the inner fender panels (wheel side) and produce a shadow above and on the bottom of this lip many times. As the painter applied paint to the radiator support they would wrap the black paint around both side and apply black on the forward inner fender panel (wheel side) back towards the shock tower pocket.
Over all of this the sound deadener was applied, that fourth coat I mentioned earlier, hiding much of these details except for around the sides, ends and into the shock tower area.
Because of the number of painters and multiple applications we can find cars with body color forward or just to the back edge of the shock tower. While others may have the black back only about 12 inches or back to the rear edge of the shock tower. In some cases all three colors/finishes are visible sometimes only two. There is no IMHO one way and that is the difficulty since many restorers want us to provide an exact and precise location for everything, for them to follow. Sure your aware that it's a range - so just make it fit or copy what was originally found on the car if possible with documentation.
So with that foundation lets look at some example
s -
As a base, for the front frame primer sealer, I've found versions of batch paint used on this area at this plant and during this production year. Here are two examples shown below. One a very dark gray - the other a lighter blue gray (along the edge where they didn't cover it with undercoating) Have others, from throughout the year, but this shows the wide range in color, tone and tint that was applied. Basically from a very dark gray - almost black to a blue or green tint gray
#1 - This is a southwestern car where the sun has baked off much of the black paint by storing it out side for many years. This one just shows how far the body color could be applied
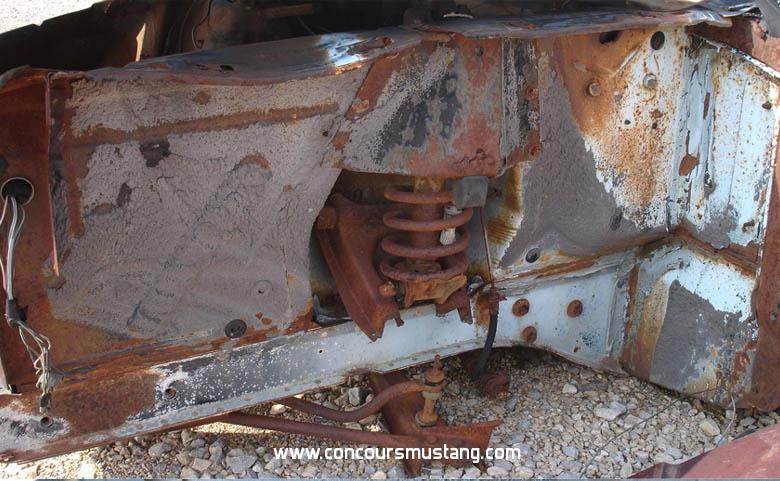
Arrows indicate forward most evidence of the light blue body color in the picture
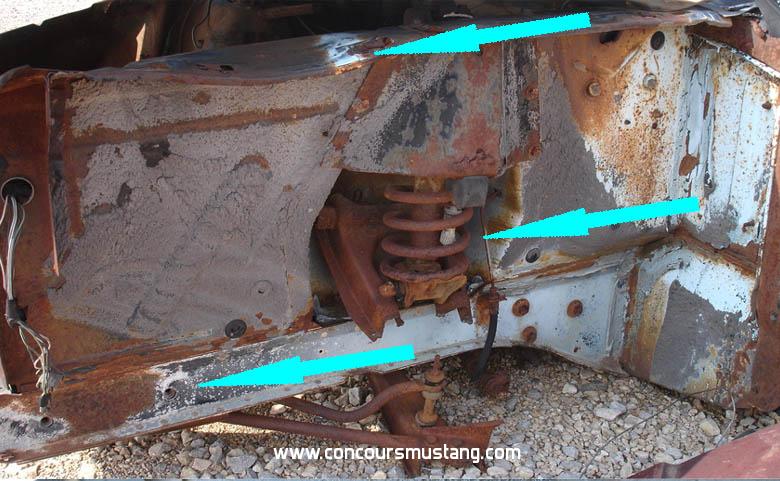
These arrows show some of the black paint application and how far rearward it reached. Since it has burn off it was likely another foot rearward with the lighter poorly covering overspray
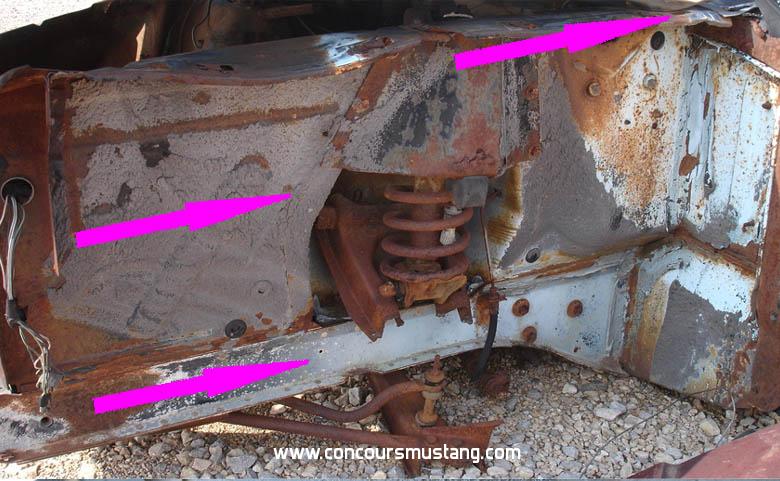
#2 - Another example. This time the red arrows indicate where the body color was applied forward and the black where the black paint (well at least on the frame rail as a gauge) appear to have been

+++++++++++++++++++++++++++++++++++++++++++++++
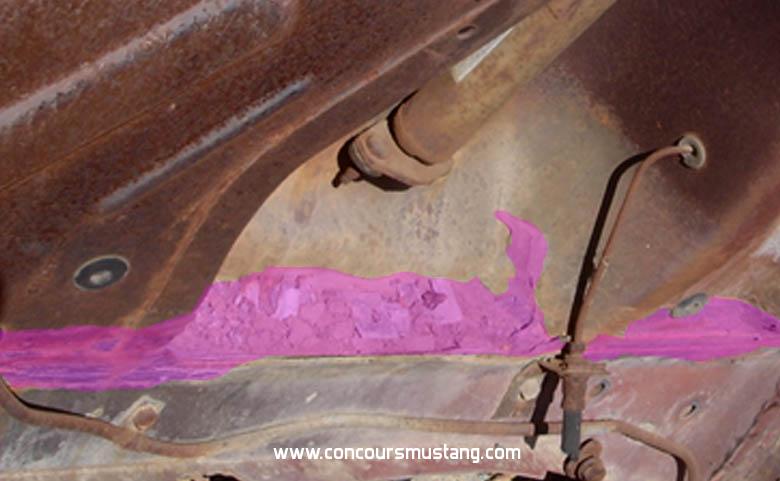
You asked about the panel edge sealants. Since Dearborn often applied a fairly heavy coat of sound deadener at that plant compared to others its often hard to determine the area of coverage and the amount. In the following pictures I tried to show what I can see as far as pattern, if the applied sealant (out of an application) was spread, how much and where on these examples to give you an idea
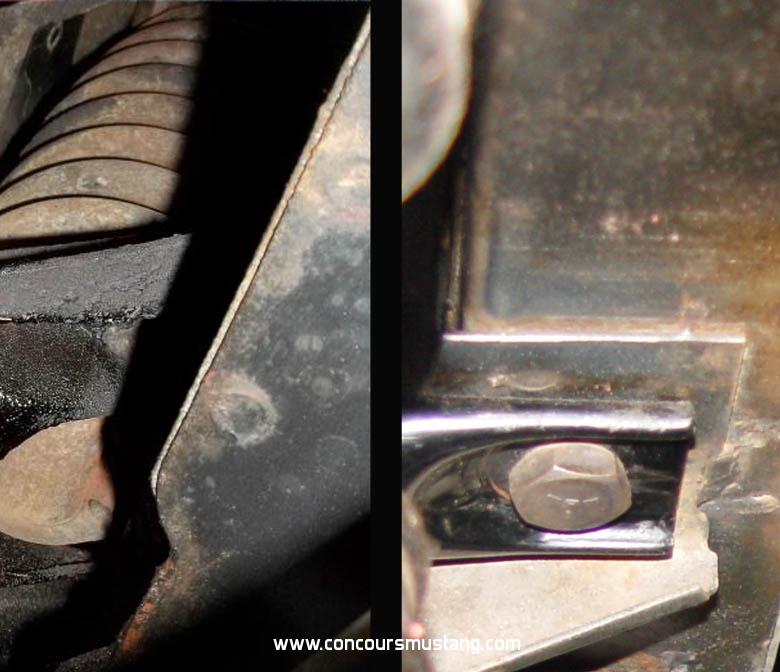
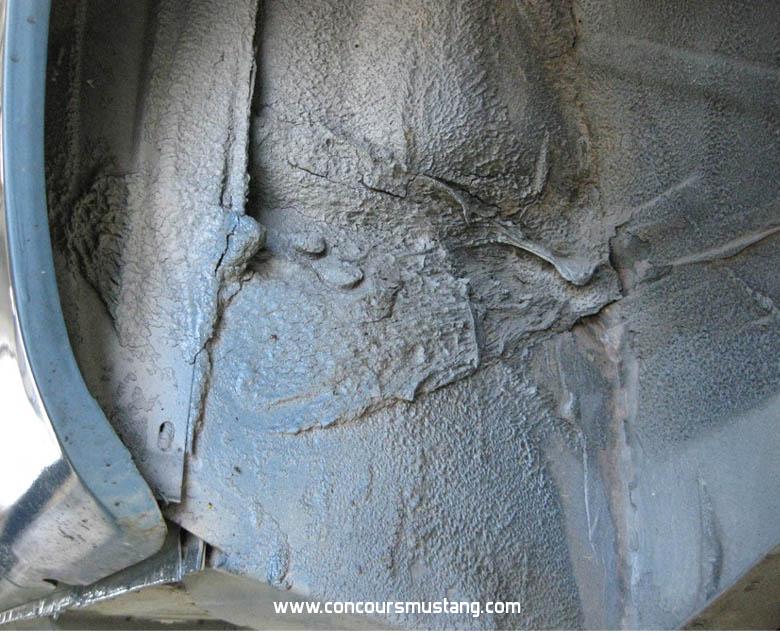
#3 - Almost erased by the amount of sound deadener applied some of applied sealant can still be made out
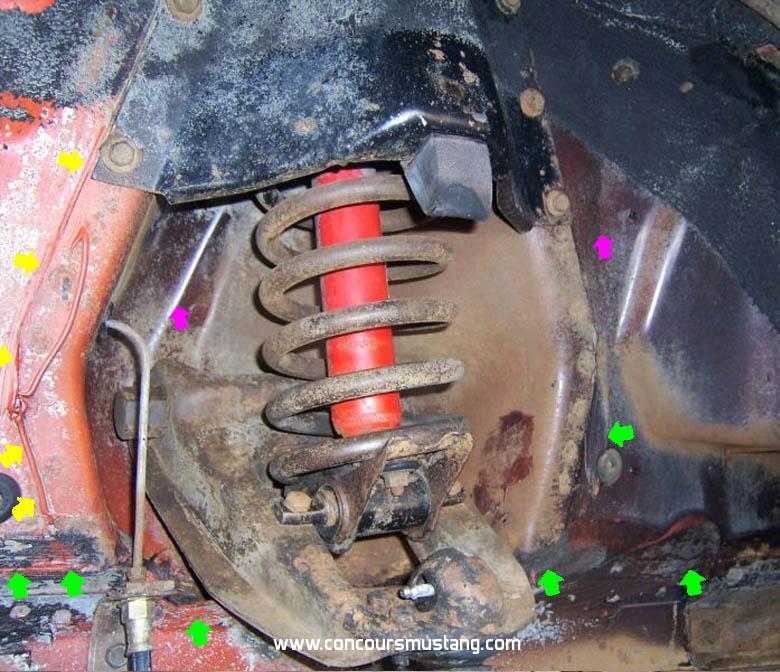
#4 - A much cleaner and nicer example from your cars period. You can make out the shock tower to inner fender panel sealant (yellow arrows) not spread with the soaked rag at the rear edge but spread at the forward seam (top forward most green arrow) but not as much applied there. Along the inner fender panel to frame edge you can make out the spread sealant under the paint coats that followed. Green arrows also

Appears to me that you can see through the thin black paint coat another color below (purple arrows). Likely the batch color that was used from the firewall forward or the body color below the thin black coat. Something is producing an almost deep purple or maroon color
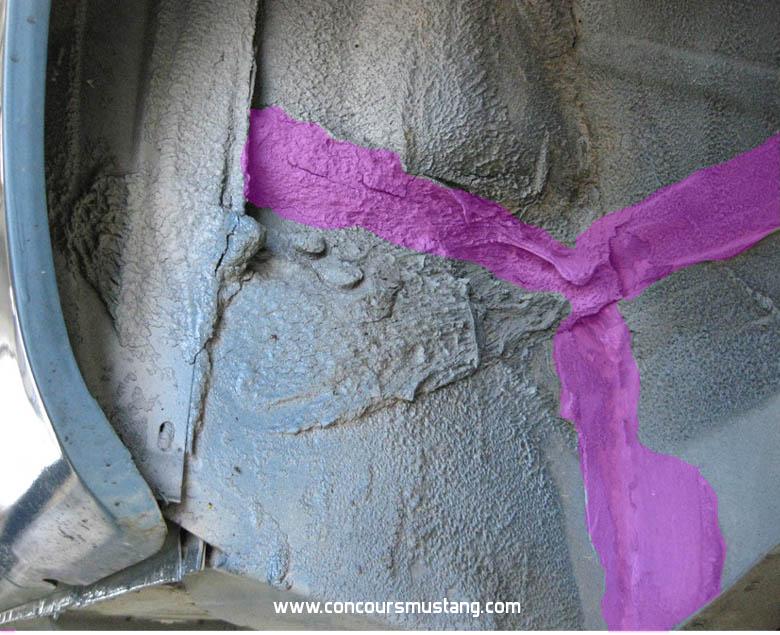
#5 - You also asked about the sealant into the shock tower pocket for this plant and period of time. Here is a well used car, but it does still provide evidence that this appears to have been a continuation of the frame to inner fender panel application. Highlighted to help you identify the pattern and area of coverage
Hope this helps and answers those questions
There are other threads that show sound deadener patterns found on other early Dearborn cars (first 10 months at least) in threads that may help as you assemble the car


