Author Topic: Engine Paper ID Stickers -  (Read 9730 times)

Offline J_Speegle

  • Administrator
  • Hero Member
  • *****
  • Posts: 24635
Engine Paper ID Stickers -
« on: January 05, 2014, 06:04:27 PM »
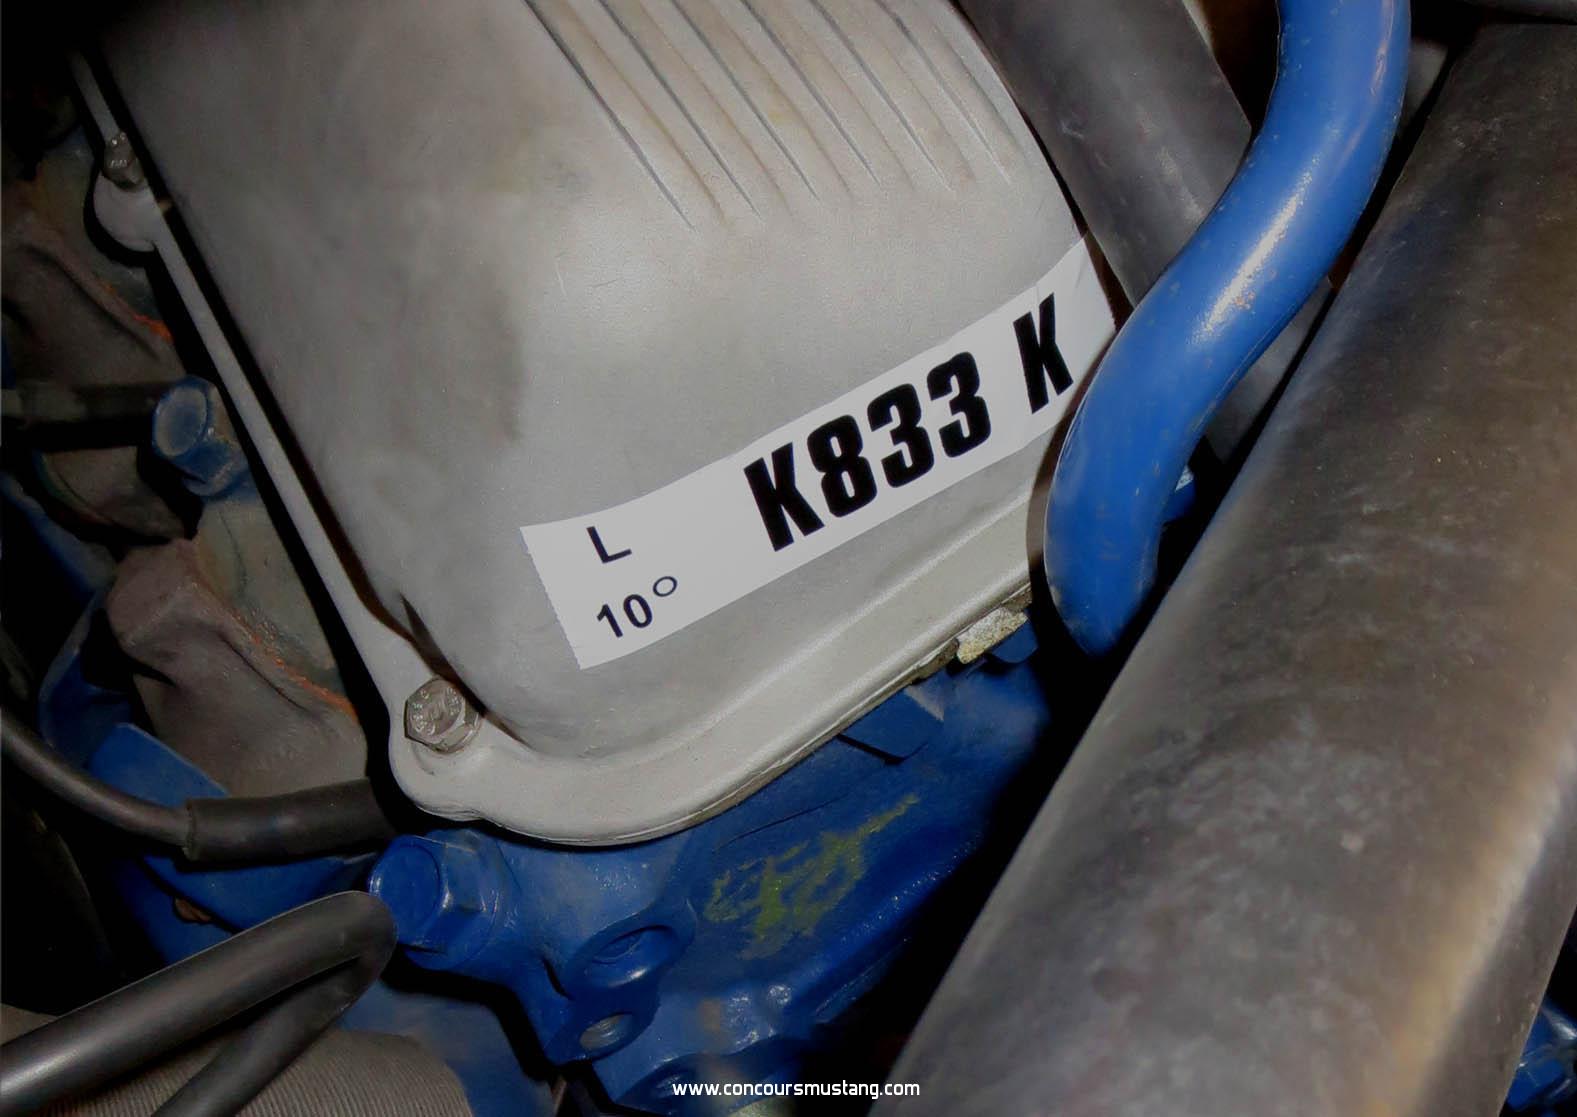
Currently and over the years the paper engine ID decals have been reproduced by the thousands. Some have been more like the originals than others but none- currently available commercially - are made out of the same material or using the original process. Since few of you will be making your own you will will be left to use what is  commercially available.

Looking at the originals they were a printed paper label/sticker with a clear layer laminated over the surface of each. Also we find fine serrated ends where it appears they were torn from a spool of labels much like we would find in a large tape dispenser today.

Here is a close up of an original where the clear laminate has separated from the base material over time. The fine serrated edge is also barely visible.
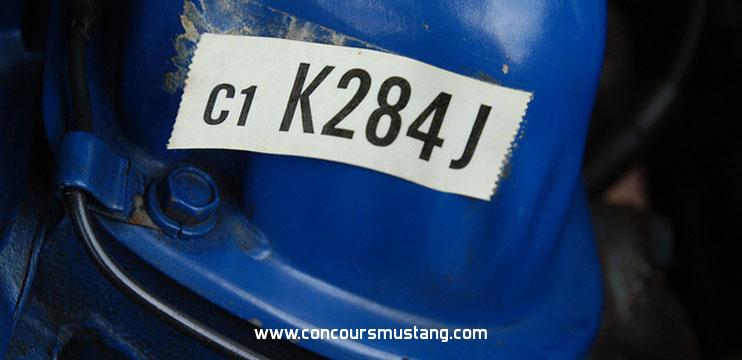


Current commercially available reproductions are based on vinyl or plastic decals with no clear laminate and ends designed with everything from rounded to jagged ends :(

Here is an example of a jagged edge similar to being cut with fabric scissors.
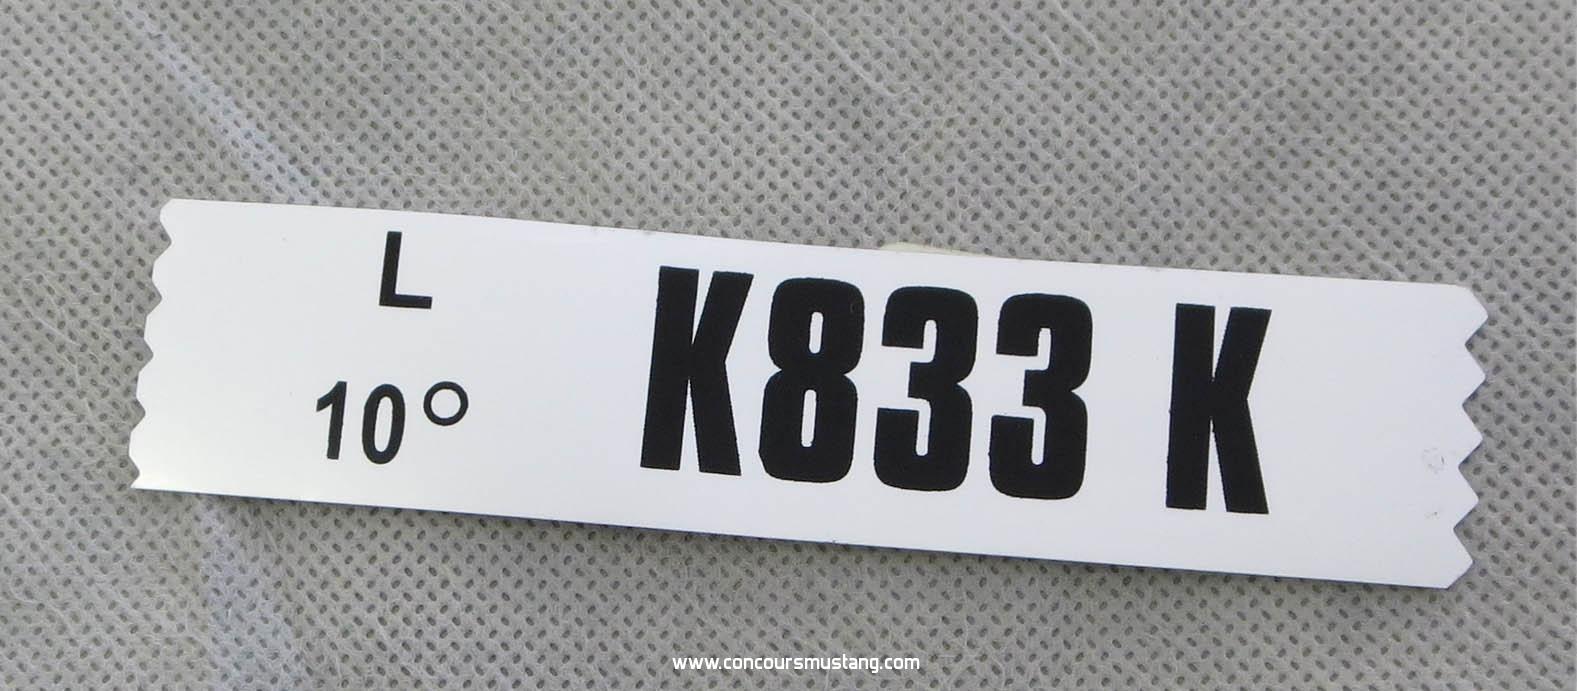


To at least improve the reproductions you may be using I've been recutting the ends using the following process to at least improve that little detail.

As always this may not be the best or easiest - just what has worked for my after trying a number of methods. Hope it helps others.

- For the process you'll need a large packaging tape dispenser and a metal object (have used a straight screw driver or other tool with a small flat edge)


- Since the labels are not delivered with much extra material on either end getting them to stay in place during the process is the first challenge. For this I fold over the end of the decal approx 1/8" from the pre cut end and place a small piece of package tape on that edge leaving a tail of approx 3". This additional tail will provide me something to anchor against the dispenser as I make the end end. I place the tap on the back side of the decal so that the finished surface of the decal is closest to the cutting edge on the dispenser for a clear cut.
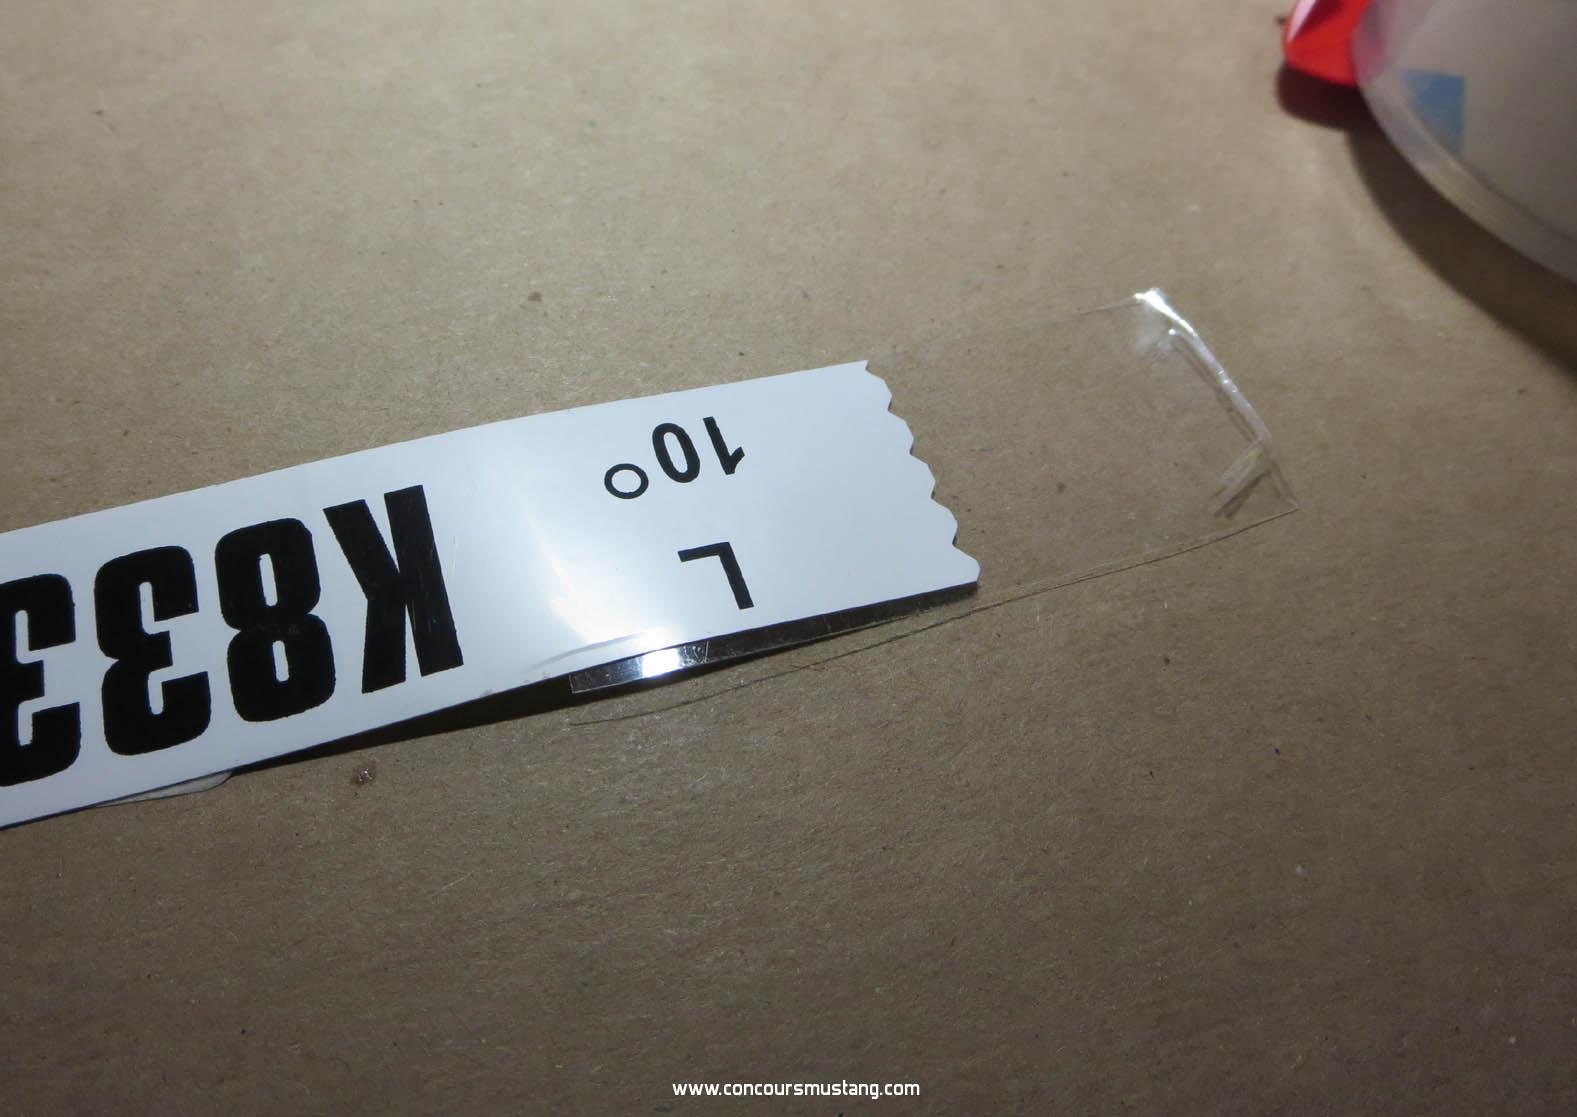
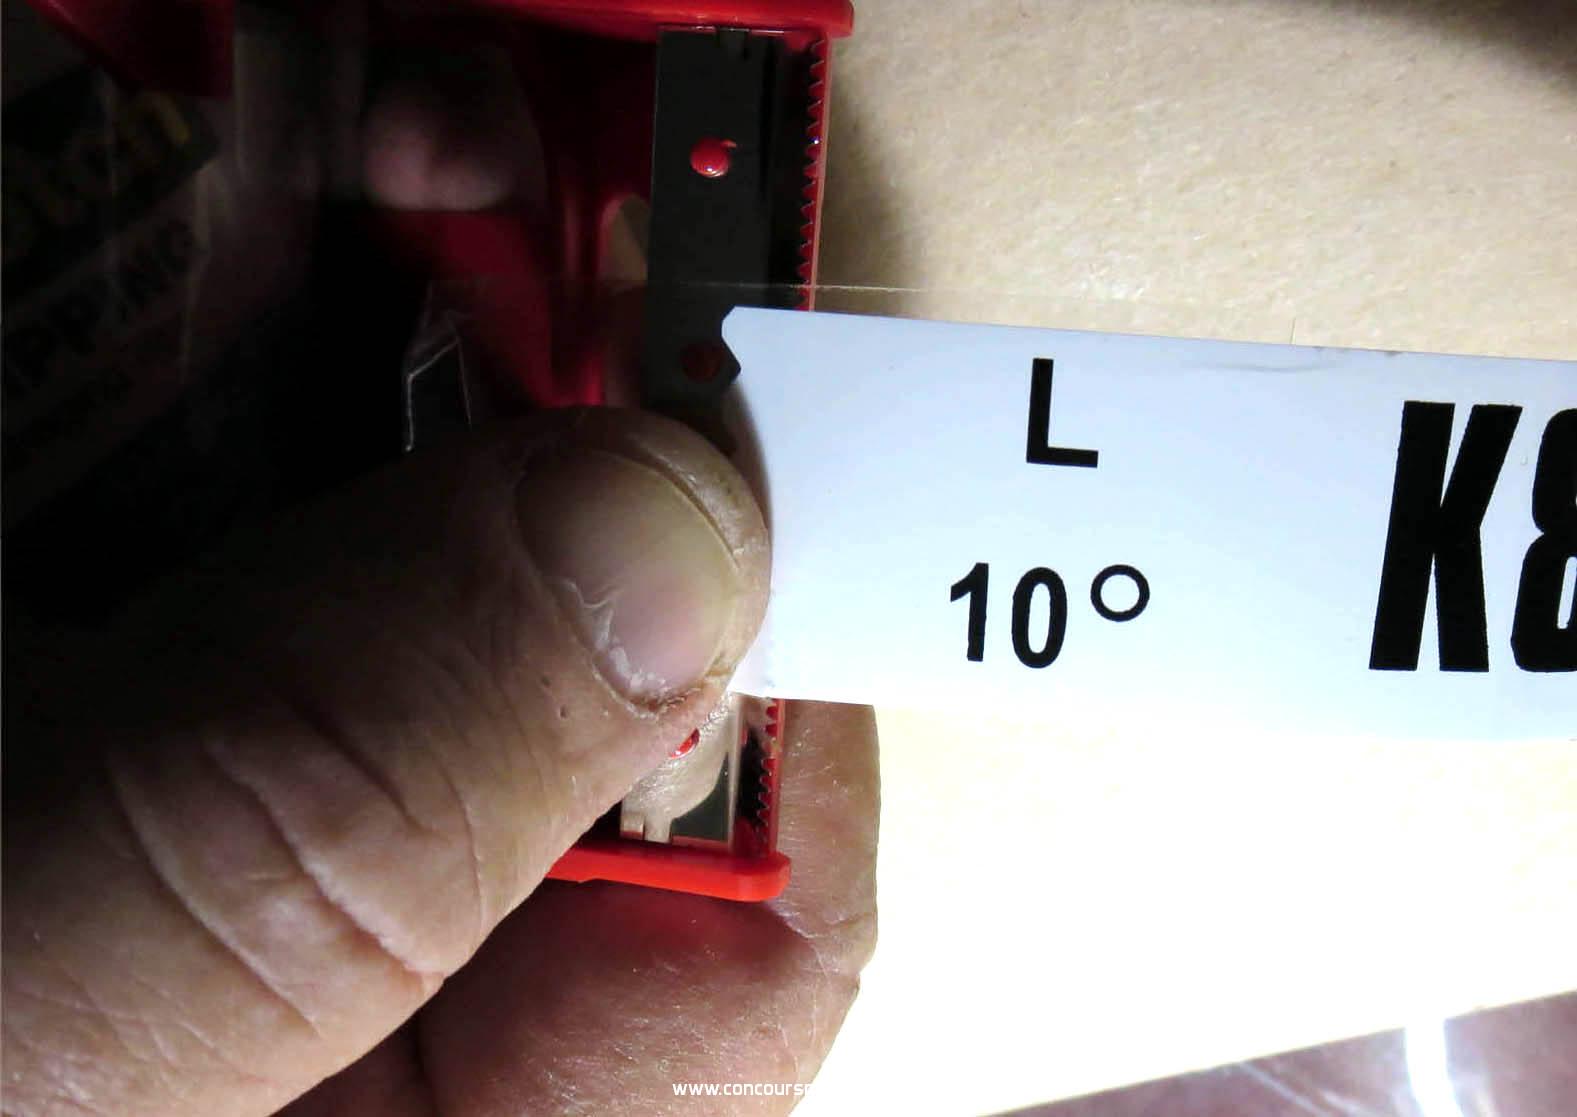


- I place the decal surface and that hard fold I placed in the decal (fold does not show well in the picture) over the cutting edge making sure that its alignment all along the edge then press the anchoring tape to the surface of the dispenser.
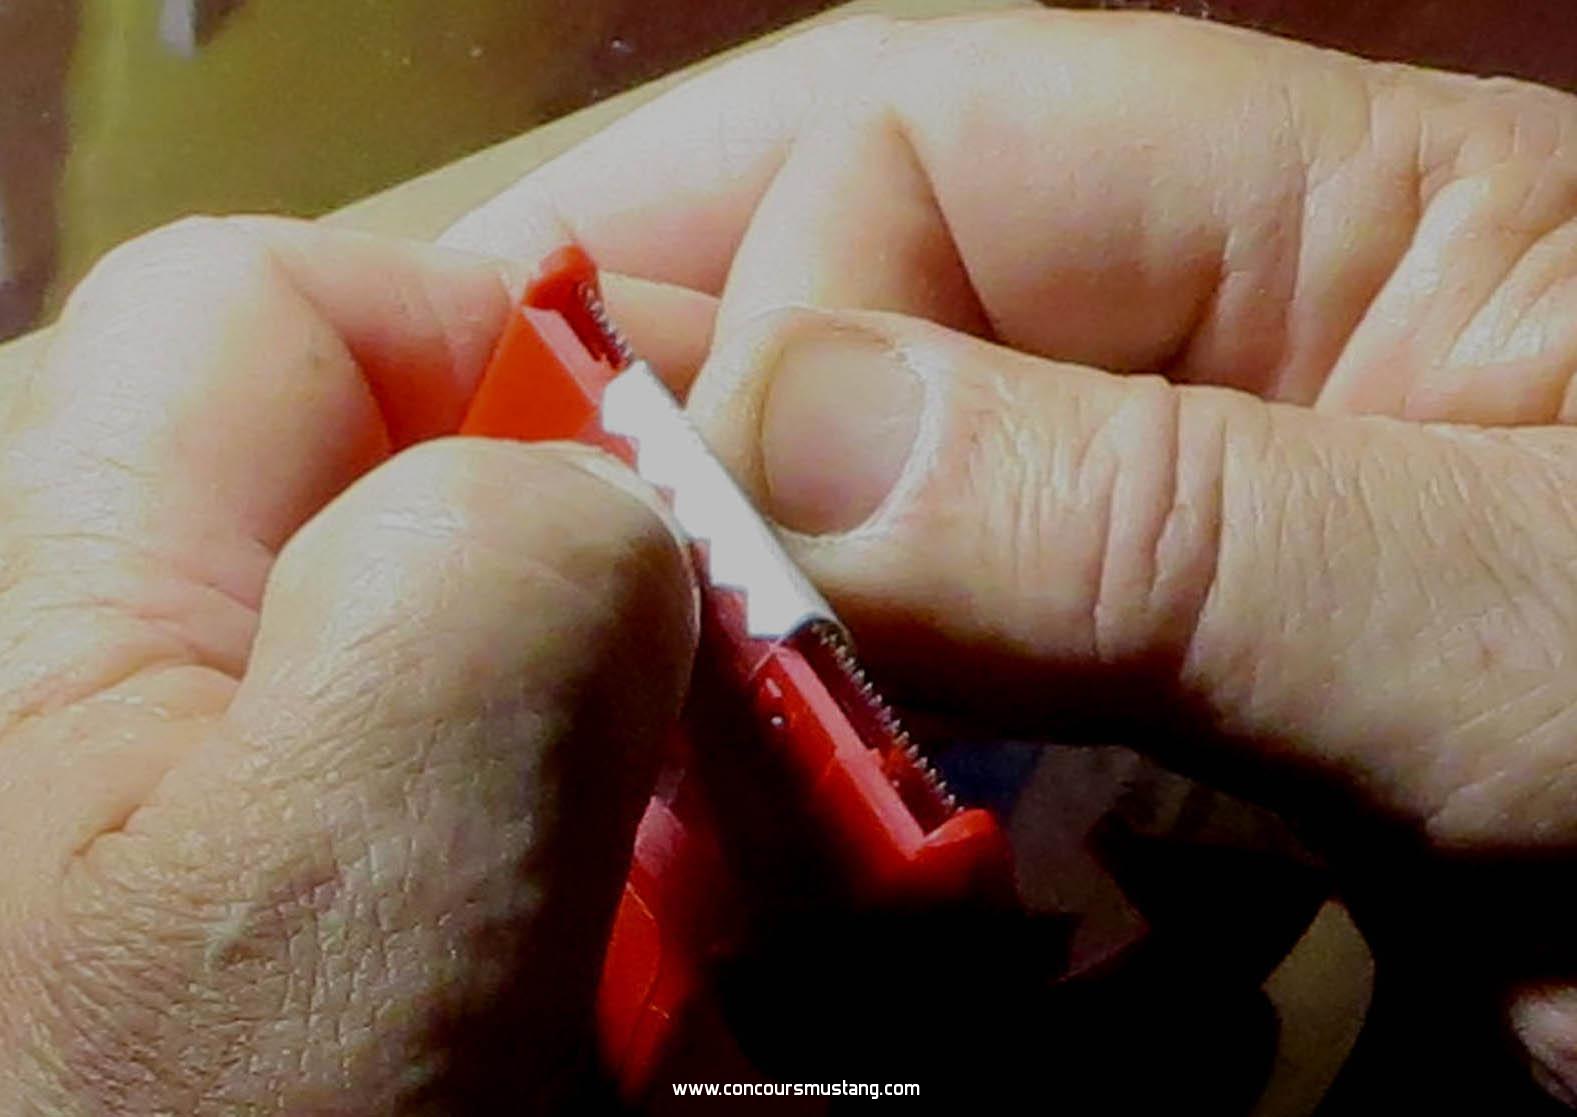
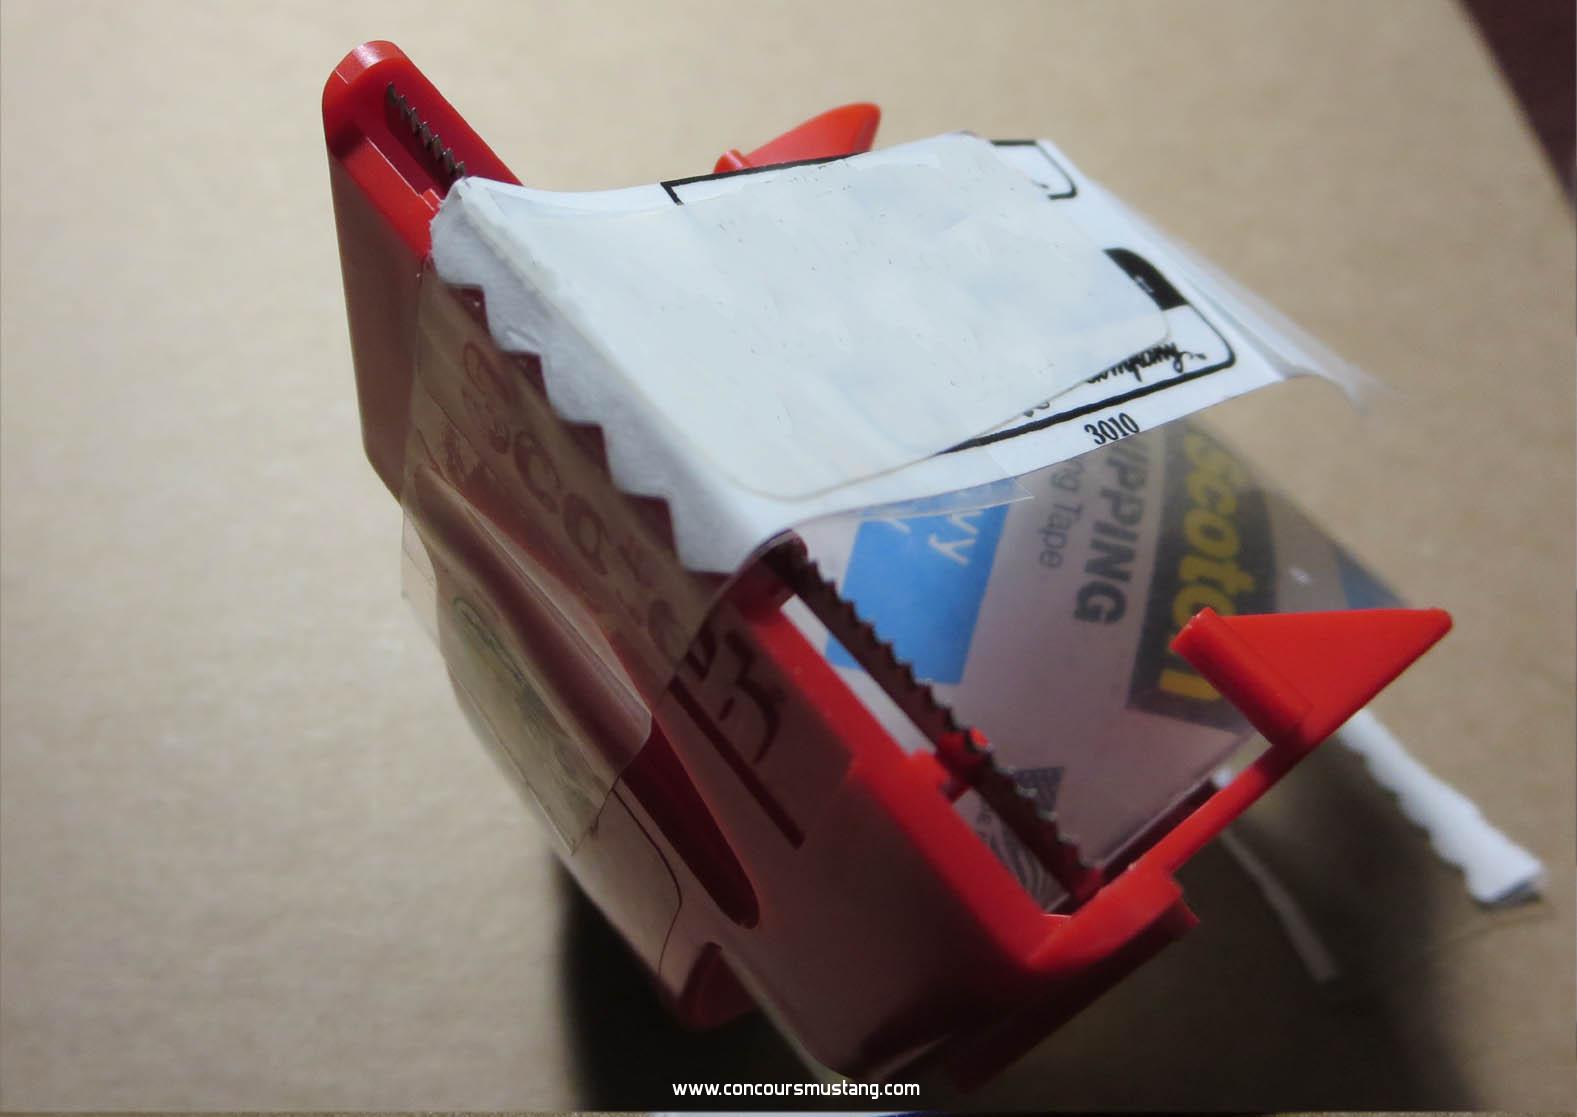


- Then while providing tension with the untapped edge, not too much just enough to insure contact  I rub the metal tool across the cutting edge which produces the new cut edge.
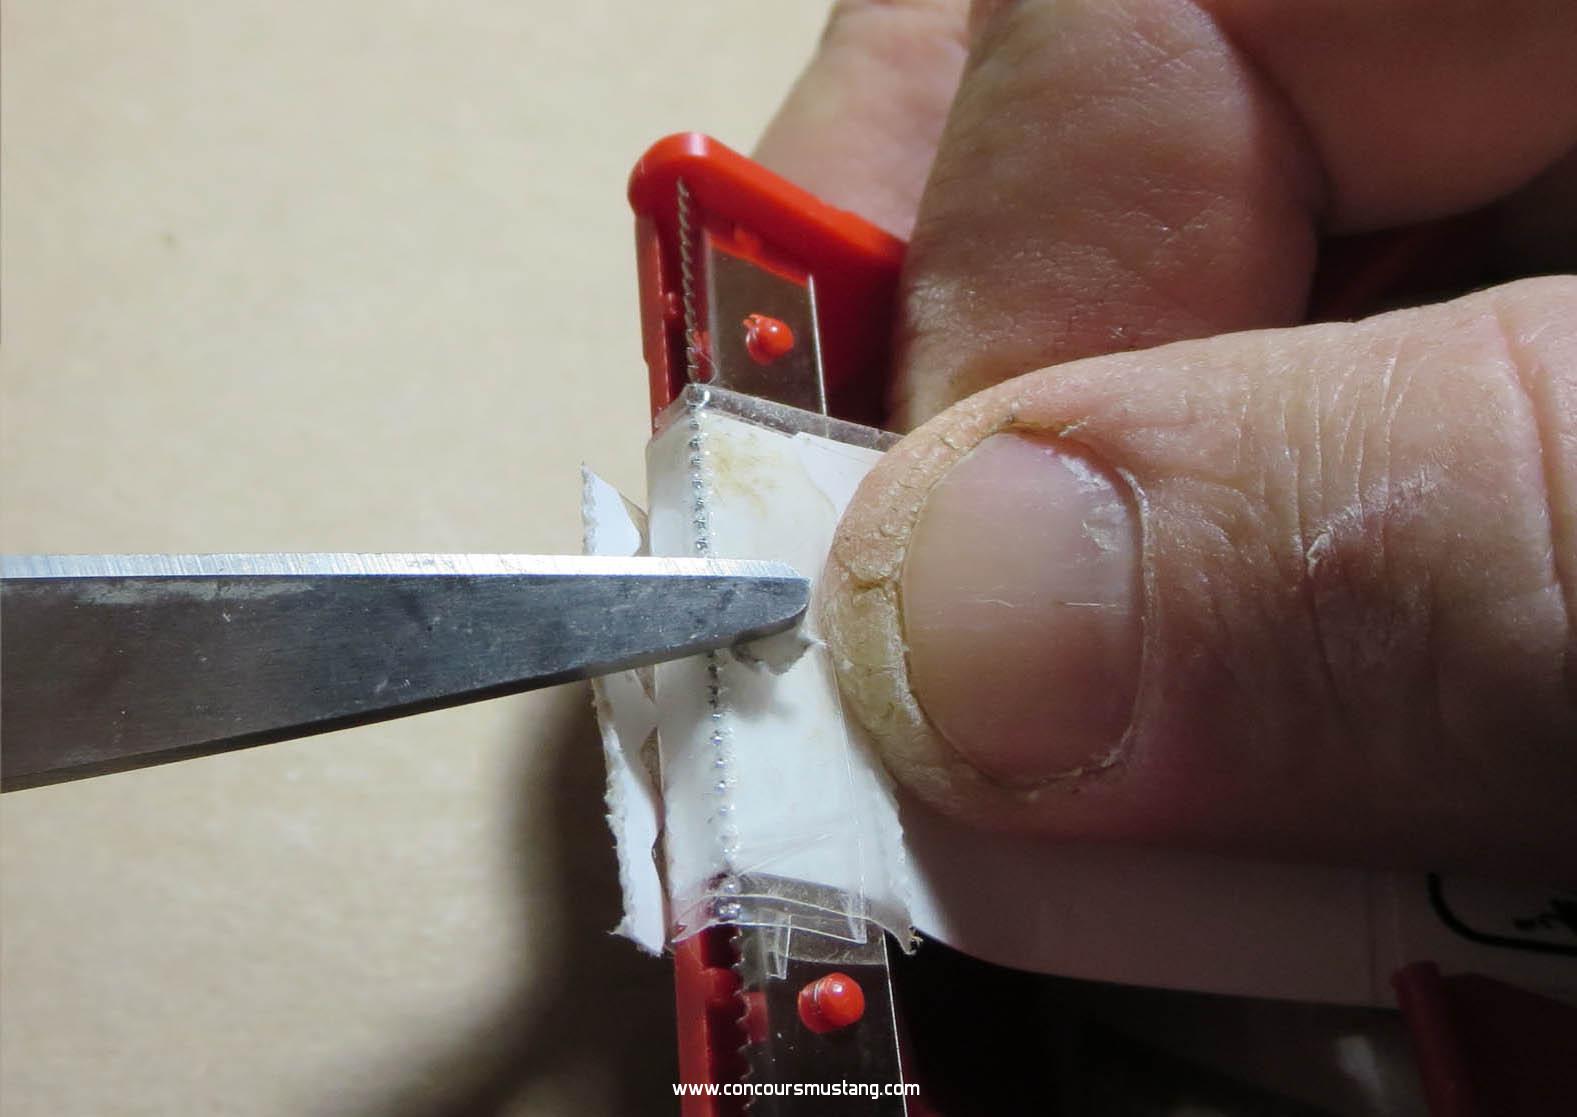


- I then repeat the same process on the other end of the decal repeating all the steps
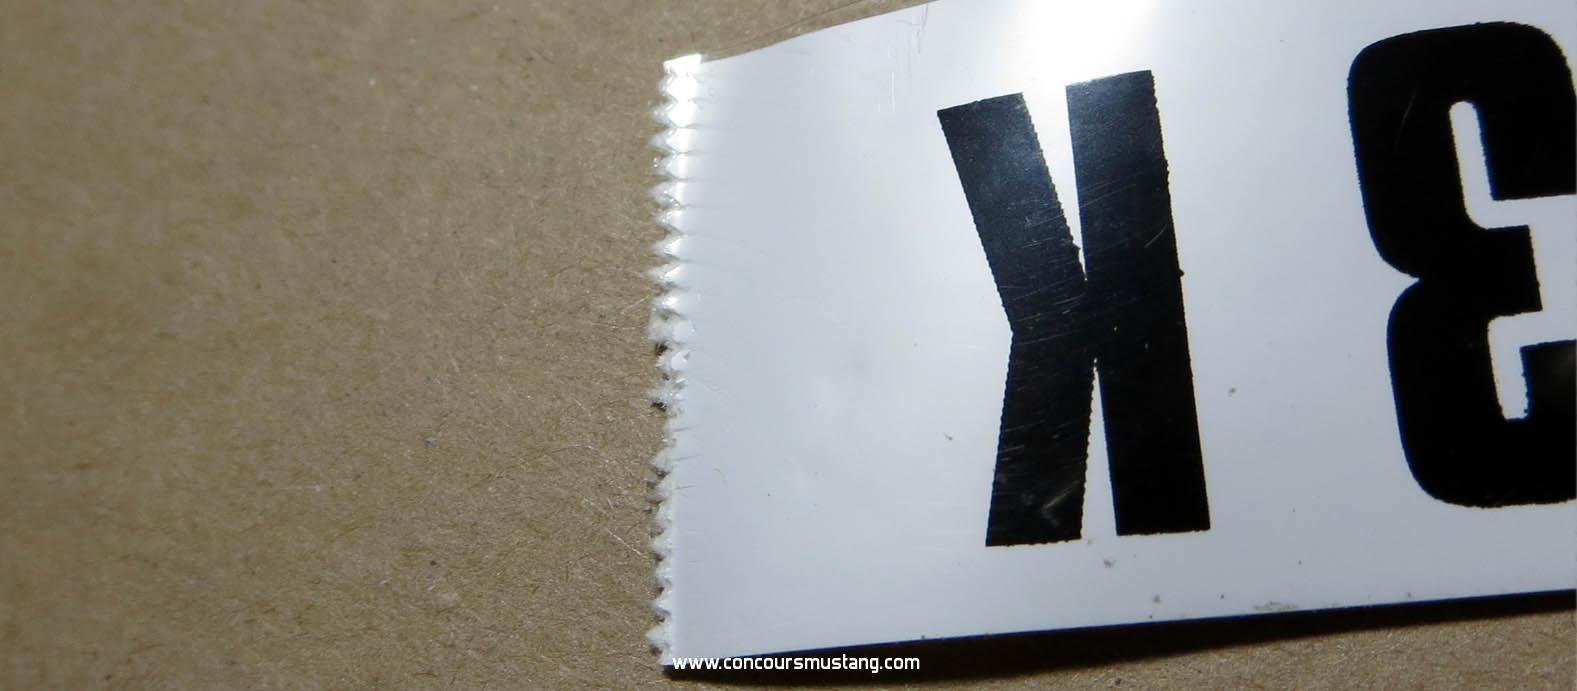


- The decal at that point is ready to be applied. Always check to make sure the location is correct for your engine type and year as the location is very different depending on those details. If the decal as a two piece backing only removed on side. This will allow you to not touch the adhesive on the rear and use the covered half to guide the decal into place. Press out any bubbles under the first half then roll off the backing on the other half, apply and press out any remaining bubbles   


- If the engine is cold or even sometimes when it is the vinyl decals can benefit from assuring a warm contact surface and even a light warming of the decal one applied to improved contact.


Hope this helps other in their effort to improve their restorations
« Last Edit: June 04, 2020, 08:09:51 PM by J_Speegle »
Jeff Speegle

Anything worth doing is worth doing concours ;)

Offline carlite65

  • Global Moderator
  • Hero Member
  • ****
  • Posts: 2416
Re: Engine Paper ID Stickers -
« Reply #1 on: January 05, 2014, 06:20:03 PM »
jeff what do you suggest to relaminate the decal? would clear shipping tape be suitable? thinking of taping the decal to a solid smooth surface & trimming around the long sides then finish the ends as you suggest above.
5F09C331248

Offline J_Speegle

  • Administrator
  • Hero Member
  • *****
  • Posts: 24635
Re: Engine Paper ID Stickers -
« Reply #2 on: January 05, 2014, 06:26:30 PM »
jeff what do you suggest to relaminate the decal? would clear shipping tape be suitable? thinking of taping the decal to a solid smooth surface & trimming around the long sides then finish the ends as you suggest above.

Yes as it will yellow slightly and can be another step at improving a not so perfect reproduction. Still going to be be vinyl but its better.  BTW its what I use when I make paper based reproductions for some of the restorations out there ;)

Also make sure that you don't pick up any lint or hair between the dispenser and the decal.

Found that a really clean smooth/glossy tile, glass, mirror (don't let the wife catch you ;) or metal surface makes a good surface to do the laminating on
Jeff Speegle

Anything worth doing is worth doing concours ;)

Offline specialed

  • Hero Member
  • *****
  • Posts: 1095
Re: Engine Paper ID Stickers -
« Reply #3 on: January 06, 2014, 03:06:39 PM »
What about ecs automotive stickers

Offline carlite65

  • Global Moderator
  • Hero Member
  • ****
  • Posts: 2416
Re: Engine Paper ID Stickers -
« Reply #4 on: January 06, 2014, 03:08:59 PM »
'ecs' is the company that makes them http://www.ecsautomotive.com
5F09C331248

Offline Brant

  • Sr. Member
  • ****
  • Posts: 497
    • Virginia Classic Mustang Inc
Re: Engine Paper ID Stickers -
« Reply #5 on: January 06, 2014, 03:11:16 PM »
Be aware that all reproduction decals are not created equally.  We carry some very nice reproductions that look quite different from the example shown here. 

Here is our '65 289 HiPo 554J decal.  It's paper with the laminate as described.  Not all of the applications are like this one, but we have them for quite few of the engines. 

Just saw Ed's post...this is an ECS manufactured decal.  If you are able to get one of their decals for your application, I personally would not go to the trouble of making your own.


« Last Edit: January 06, 2014, 03:13:12 PM by Brant »

Offline edwardgt350

  • Jr. Member
  • **
  • Posts: 86
Re: Engine Paper ID Stickers -
« Reply #6 on: December 02, 2017, 08:26:35 PM »
is the 66 engine id sticker the same as the 65?

Offline J_Speegle

  • Administrator
  • Hero Member
  • *****
  • Posts: 24635
Re: Engine Paper ID Stickers -
« Reply #7 on: December 02, 2017, 08:56:43 PM »
is the 66 engine id sticker the same as the 65?

No. Remember different ID stickers (within the same year) depending on engine type and transmission type plus thermactor and non-thermactor engines

Lots of variables
Jeff Speegle

Anything worth doing is worth doing concours ;)

Offline J_Speegle

  • Administrator
  • Hero Member
  • *****
  • Posts: 24635
Re: Engine Paper ID Stickers -
« Reply #8 on: March 01, 2019, 07:45:39 PM »
The subject of applying adhesive to the back of self made reproduction stickers and decals came up in another recent thread but felt the answer needed to be grouped together with similar discussions so choose to post it here.

As for adhesive I now use a small machine that applies a adhesive backing on the label. comes in a number of levels of adhesive
I think I said that.A rather "ambiguous" machine. Got a manufacturer's name?

I've been using a Xyron Creative Station (9" wide version) model 900 with permanent adhesive refill cartridges

It's a hand crank little machine used by crafters,  scrap bookers  and the like.


Jeff Speegle

Anything worth doing is worth doing concours ;)

Offline cobrajet_carl

  • Sr. Member
  • ****
  • Posts: 363
Re: Engine Paper ID Stickers -
« Reply #9 on: May 02, 2020, 04:57:23 PM »
What sizes are the decals? Does the size vary with engine assembly plant?
Carl
70 and 71 Dearborn mach Is

Offline J_Speegle

  • Administrator
  • Hero Member
  • *****
  • Posts: 24635
Re: Engine Paper ID Stickers -
« Reply #10 on: May 02, 2020, 05:40:48 PM »
What sizes are the decals? Does the size vary with engine assembly plant?

Haven't found a difference as far as how tall the labels are between engine plants - believe that is one thing they all did the same and they might have all  been supplied by the same printer. As far as height of the sticker I use 1". Length of each would differ slightly depending on where the worker applying the sticker choose to tear each one
Jeff Speegle

Anything worth doing is worth doing concours ;)

Offline RoyceP

  • Hero Member
  • *****
  • Posts: 1536
Re: Engine Paper ID Stickers -
« Reply #11 on: May 03, 2020, 01:03:33 PM »
On this topic the restorer needs to know that many of these decals are being made ( I won't use the word reproduced for something made so poorly) with the incorrect engine plant identification. For example, ECS (and others) make 428CJ labels that have the engine plant "L" instead of the correct letter "D". I have brought this to their attention and was rewarded with emails from them about how they are only going to make the decals correctly if they have an original example to copy.

The restorer who seeks the accurate label will be forced to either modify the L into a D or to make the label from scratch.
1968 W code 427 Cougar XR-7 GTE Feb 23 Dearborn C6 / 3.50 open
1968 R code 428CJ Cougar XR-7 May 13 Dearborn C6 / 3.91 T - Lock

Offline cobrajet_carl

  • Sr. Member
  • ****
  • Posts: 363
Re: Engine Paper ID Stickers -
« Reply #12 on: May 19, 2020, 02:38:07 PM »
On this topic the restorer needs to know that many of these decals are being made ( I won't use the word reproduced for something made so poorly) with the incorrect engine plant identification. For example, ECS (and others) make 428CJ labels that have the engine plant "L" instead of the correct letter "D". I have brought this to their attention and was rewarded with emails from them about how they are only going to make the decals correctly if they have an original example to copy.

The restorer who seeks the accurate label will be forced to either modify the L into a D or to make the label from scratch.
It would be nice if there were originals to copy from for all engines. I have two 1970 351C machs that I want to make decals for but I have no idea what they originally looked like other than size. I've narrowed it down to these 2 styles. But neither might be correct...I mean in the left side either being C above the timing or just a small C1. The actual engine codes are known, of course.

Actually I think the C1 might not be correct for a 351 Cleveland. But again, I don't know. ???
« Last Edit: May 22, 2020, 05:19:07 PM by cobrajet_carl »
Carl
70 and 71 Dearborn mach Is

Offline silverelvis69

  • Full Member
  • ***
  • Posts: 146
Re: Engine Paper ID Stickers -
« Reply #13 on: September 28, 2020, 05:56:31 AM »
Mine is K 6'  K609AG

I believe it is K October 6
G AC

http://1970mach1.homestead.com/3514VC.html
1970 Mach1 351 Cleaveland 4V-V8
San Jose built
11/69
Mustang mach1 2-door sports roof
Dark ivy green metallic
FMX select shift automatic transmission.
Ps A/c

Offline cobrajet_carl

  • Sr. Member
  • ****
  • Posts: 363
Re: Engine Paper ID Stickers -
« Reply #14 on: September 28, 2020, 12:50:36 PM »
No, the K means Non-Thermactor. For 1970 the A suffix is the change level. The G was added if the car had A/C. So possibilities are for a 1970 M code are K608A, K608AG, K609A, K609AG. I have never seen a B suffix for the 351C during the 70 model year.
Carl
70 and 71 Dearborn mach Is